You are here
Cable Splicing
"Most of the cables used on Aircraft during the First World War period fall into one of three categories. Hard Wires, Streamlined/Swaged Wires or Multi-strand cable."
The Process
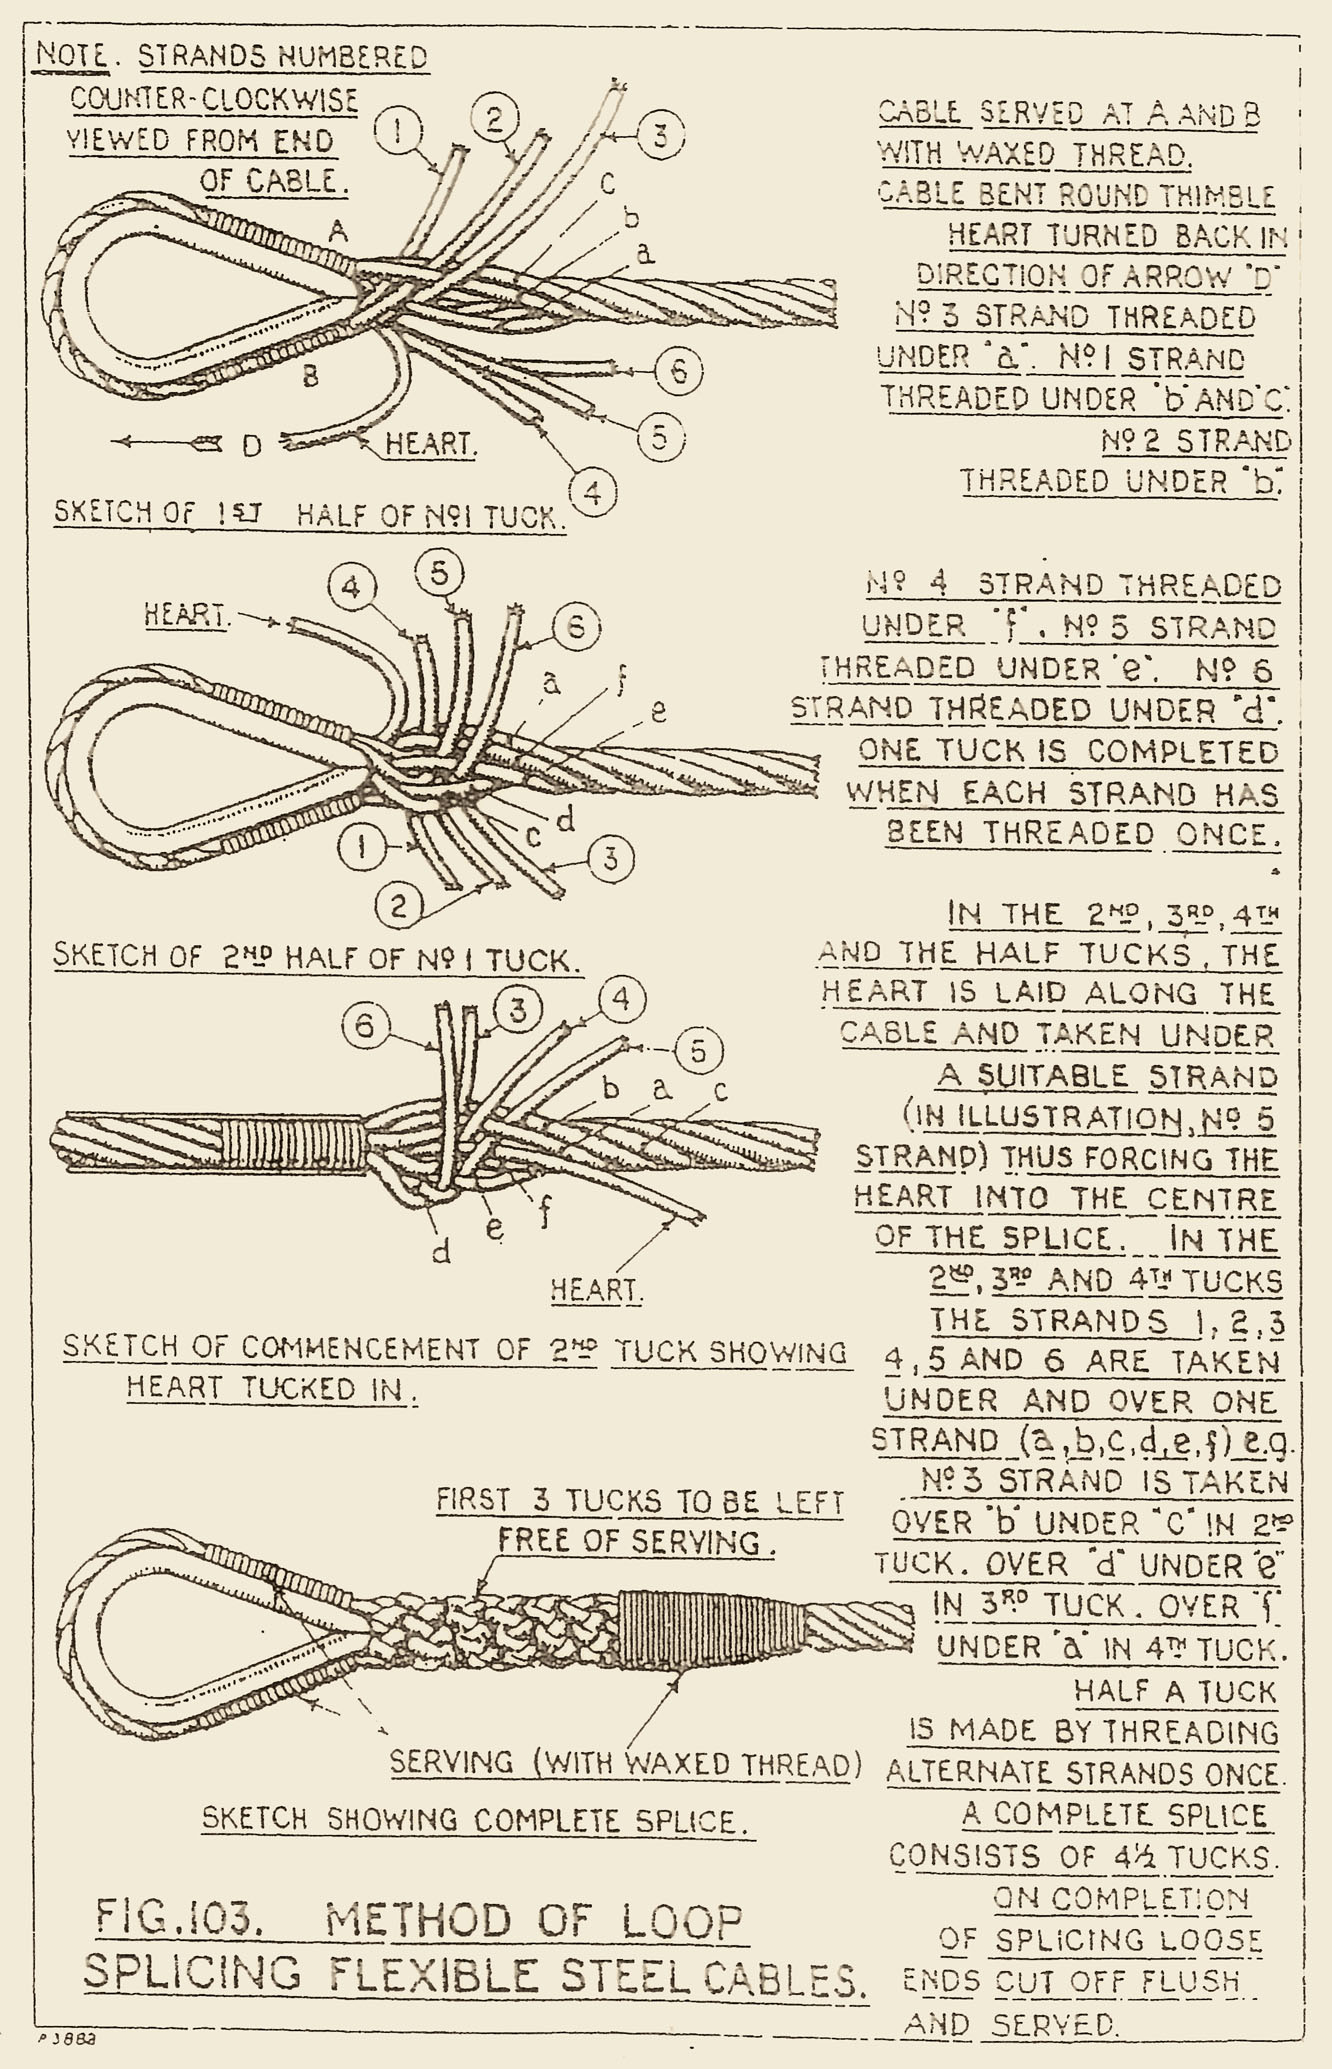
The British primarily, though not exclusively, used Swaged or Hard wires for internal bracing wires, Streamlined wires or Multi strand cable for flying wires and external bracing wires and Multi strand cables for control cables. Multi strand cable usually comes in the 7x19 or 7x14 format, meaning one length of cable contains seven wires with fourteen or nineteen strands per wire. The cable has one ‘Heart Wire’ with six outer wires wrapped around it as per diagram.
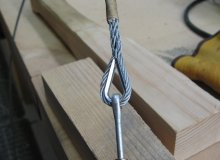
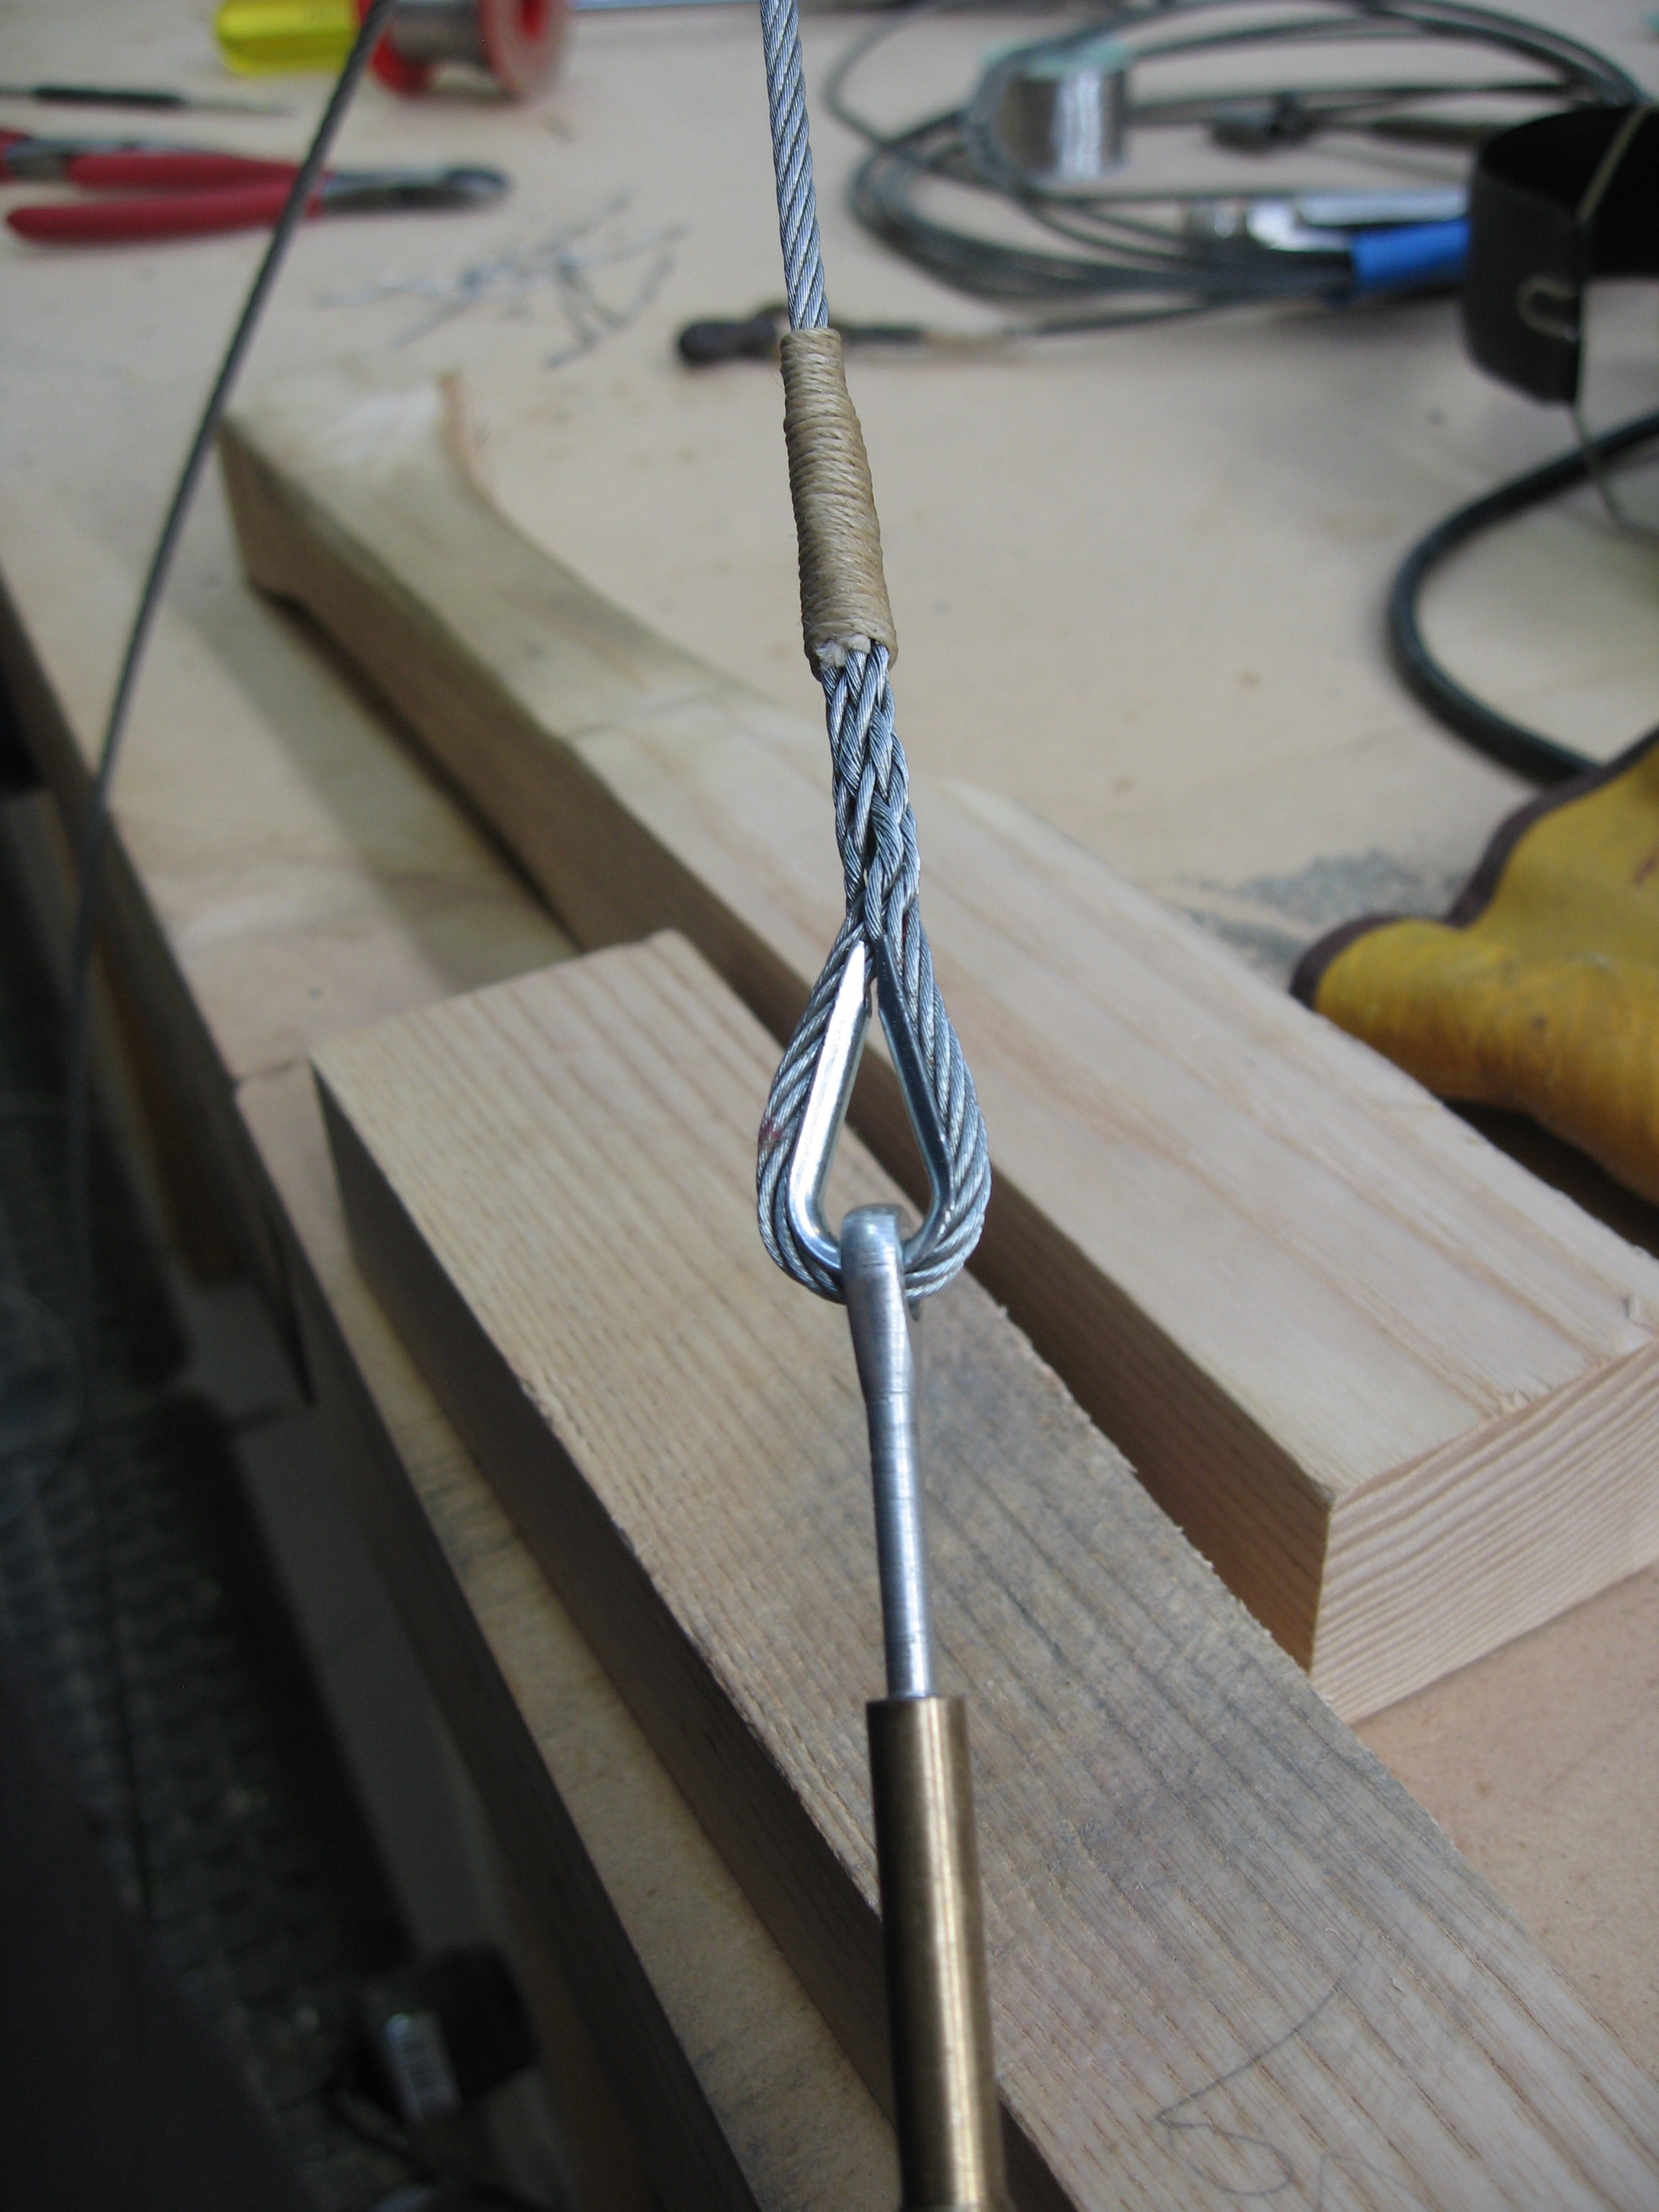
The cables are connected onto brackets or other components by means of shackles or turnbuckles which are spliced into eyes at the end of the cable. The shackle gives a direct connection and the turnbuckle allows for an adjustable connection to tension the cable. The eye is most often formed around a thimble to give it shape and to protect the wire from chaffing on the fittings.
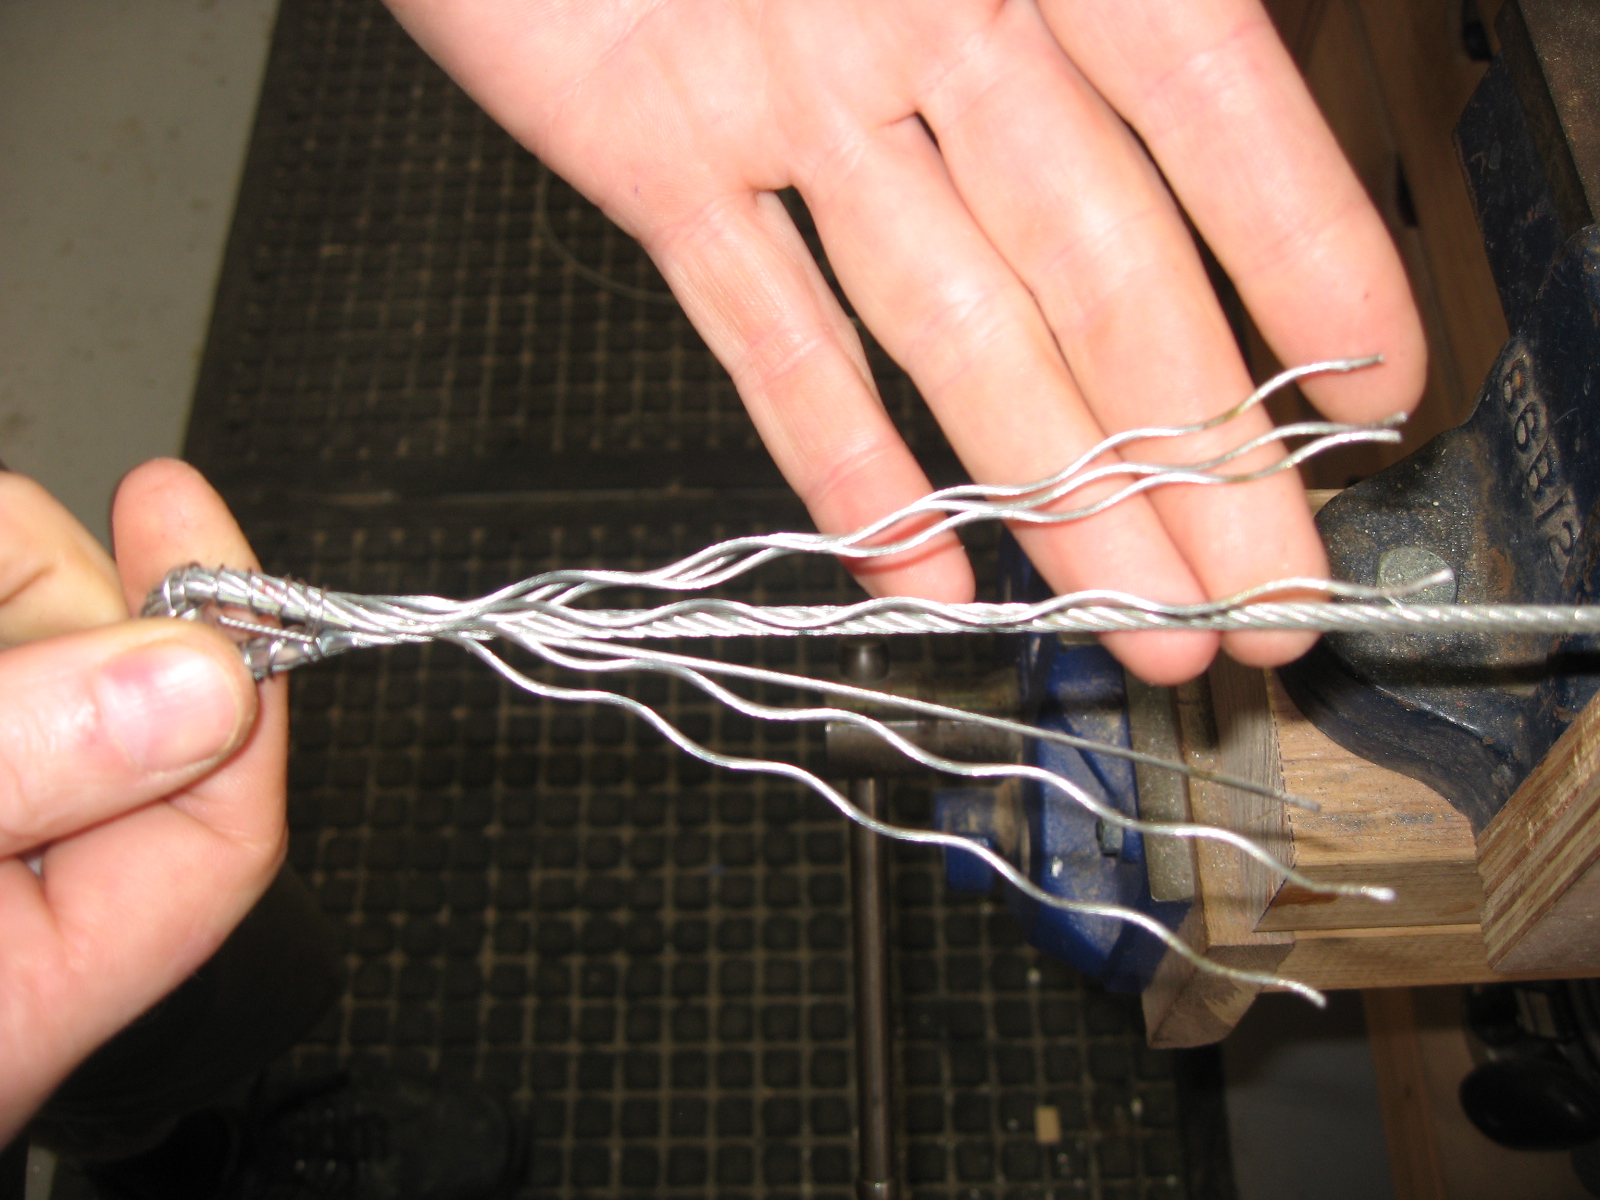
The main principle of splicing is to weave the ends of the cable back into itself to form the eye around the thimble. There are several different types of splice that can be used and there is evidence to show that these even varied from country to country. The one that we have based our splicing on comes from an original wire from a Bristol F2b Fighter.
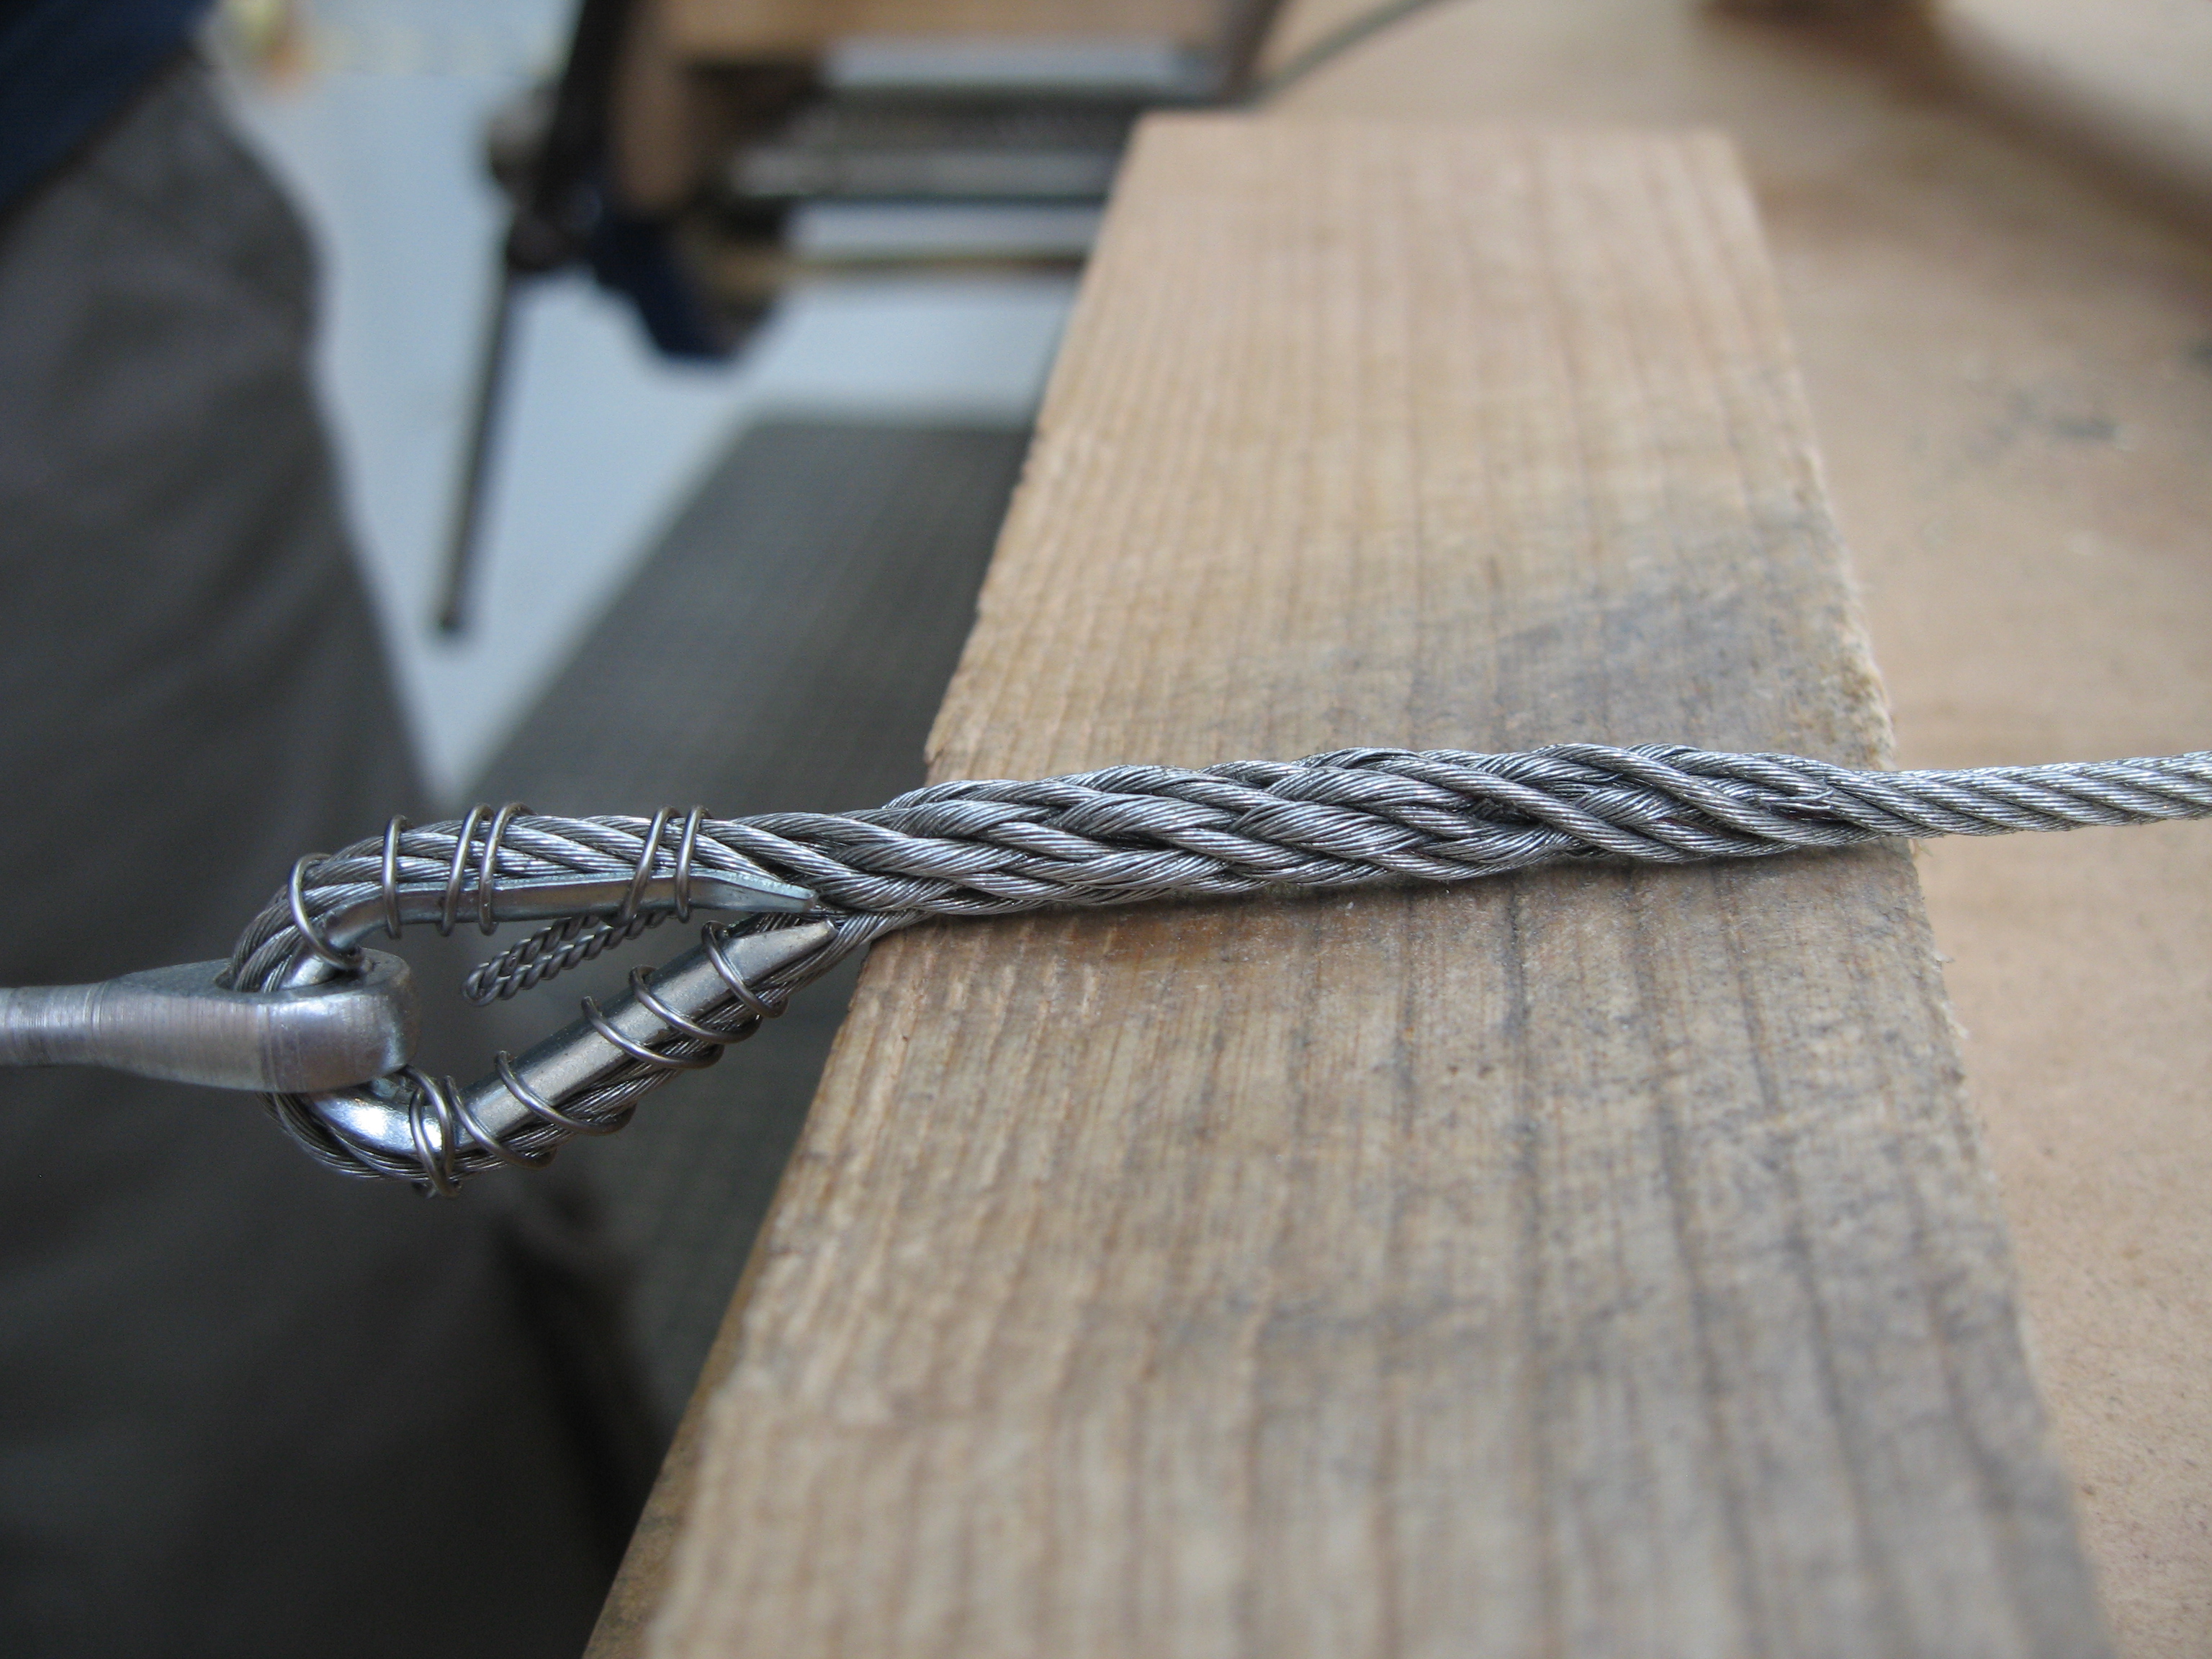
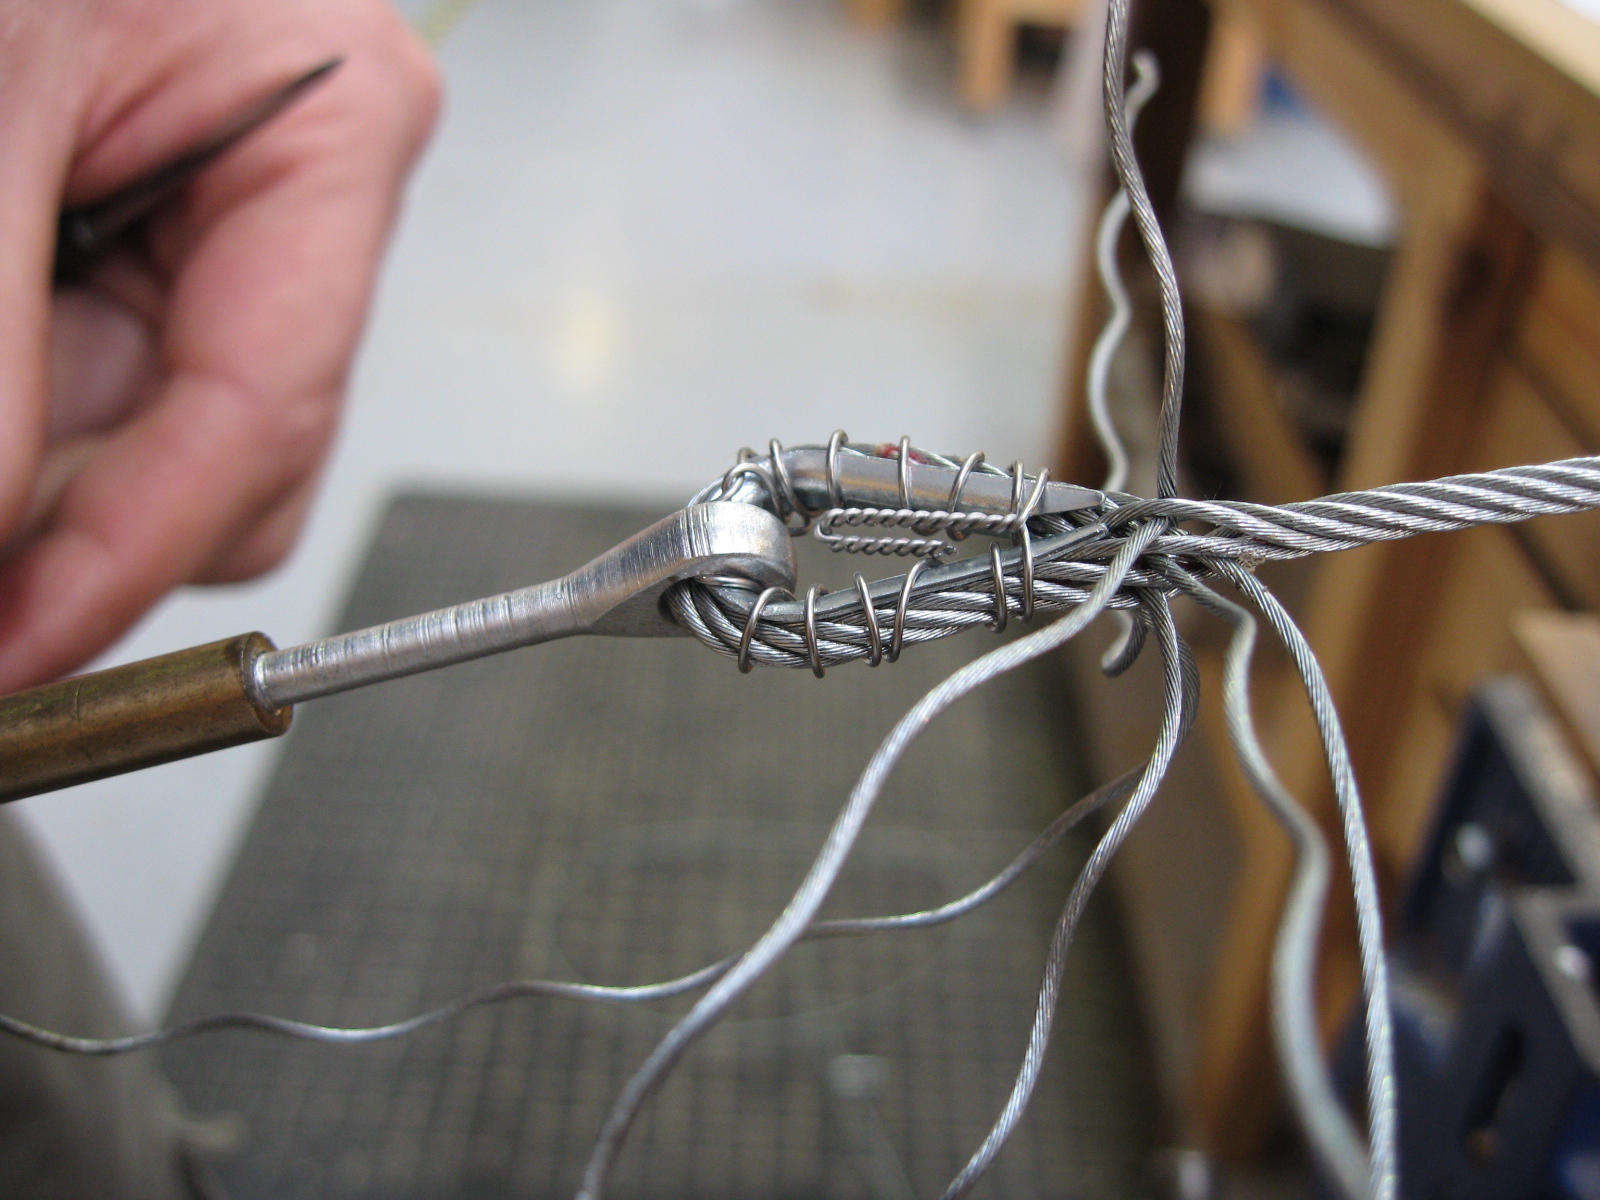
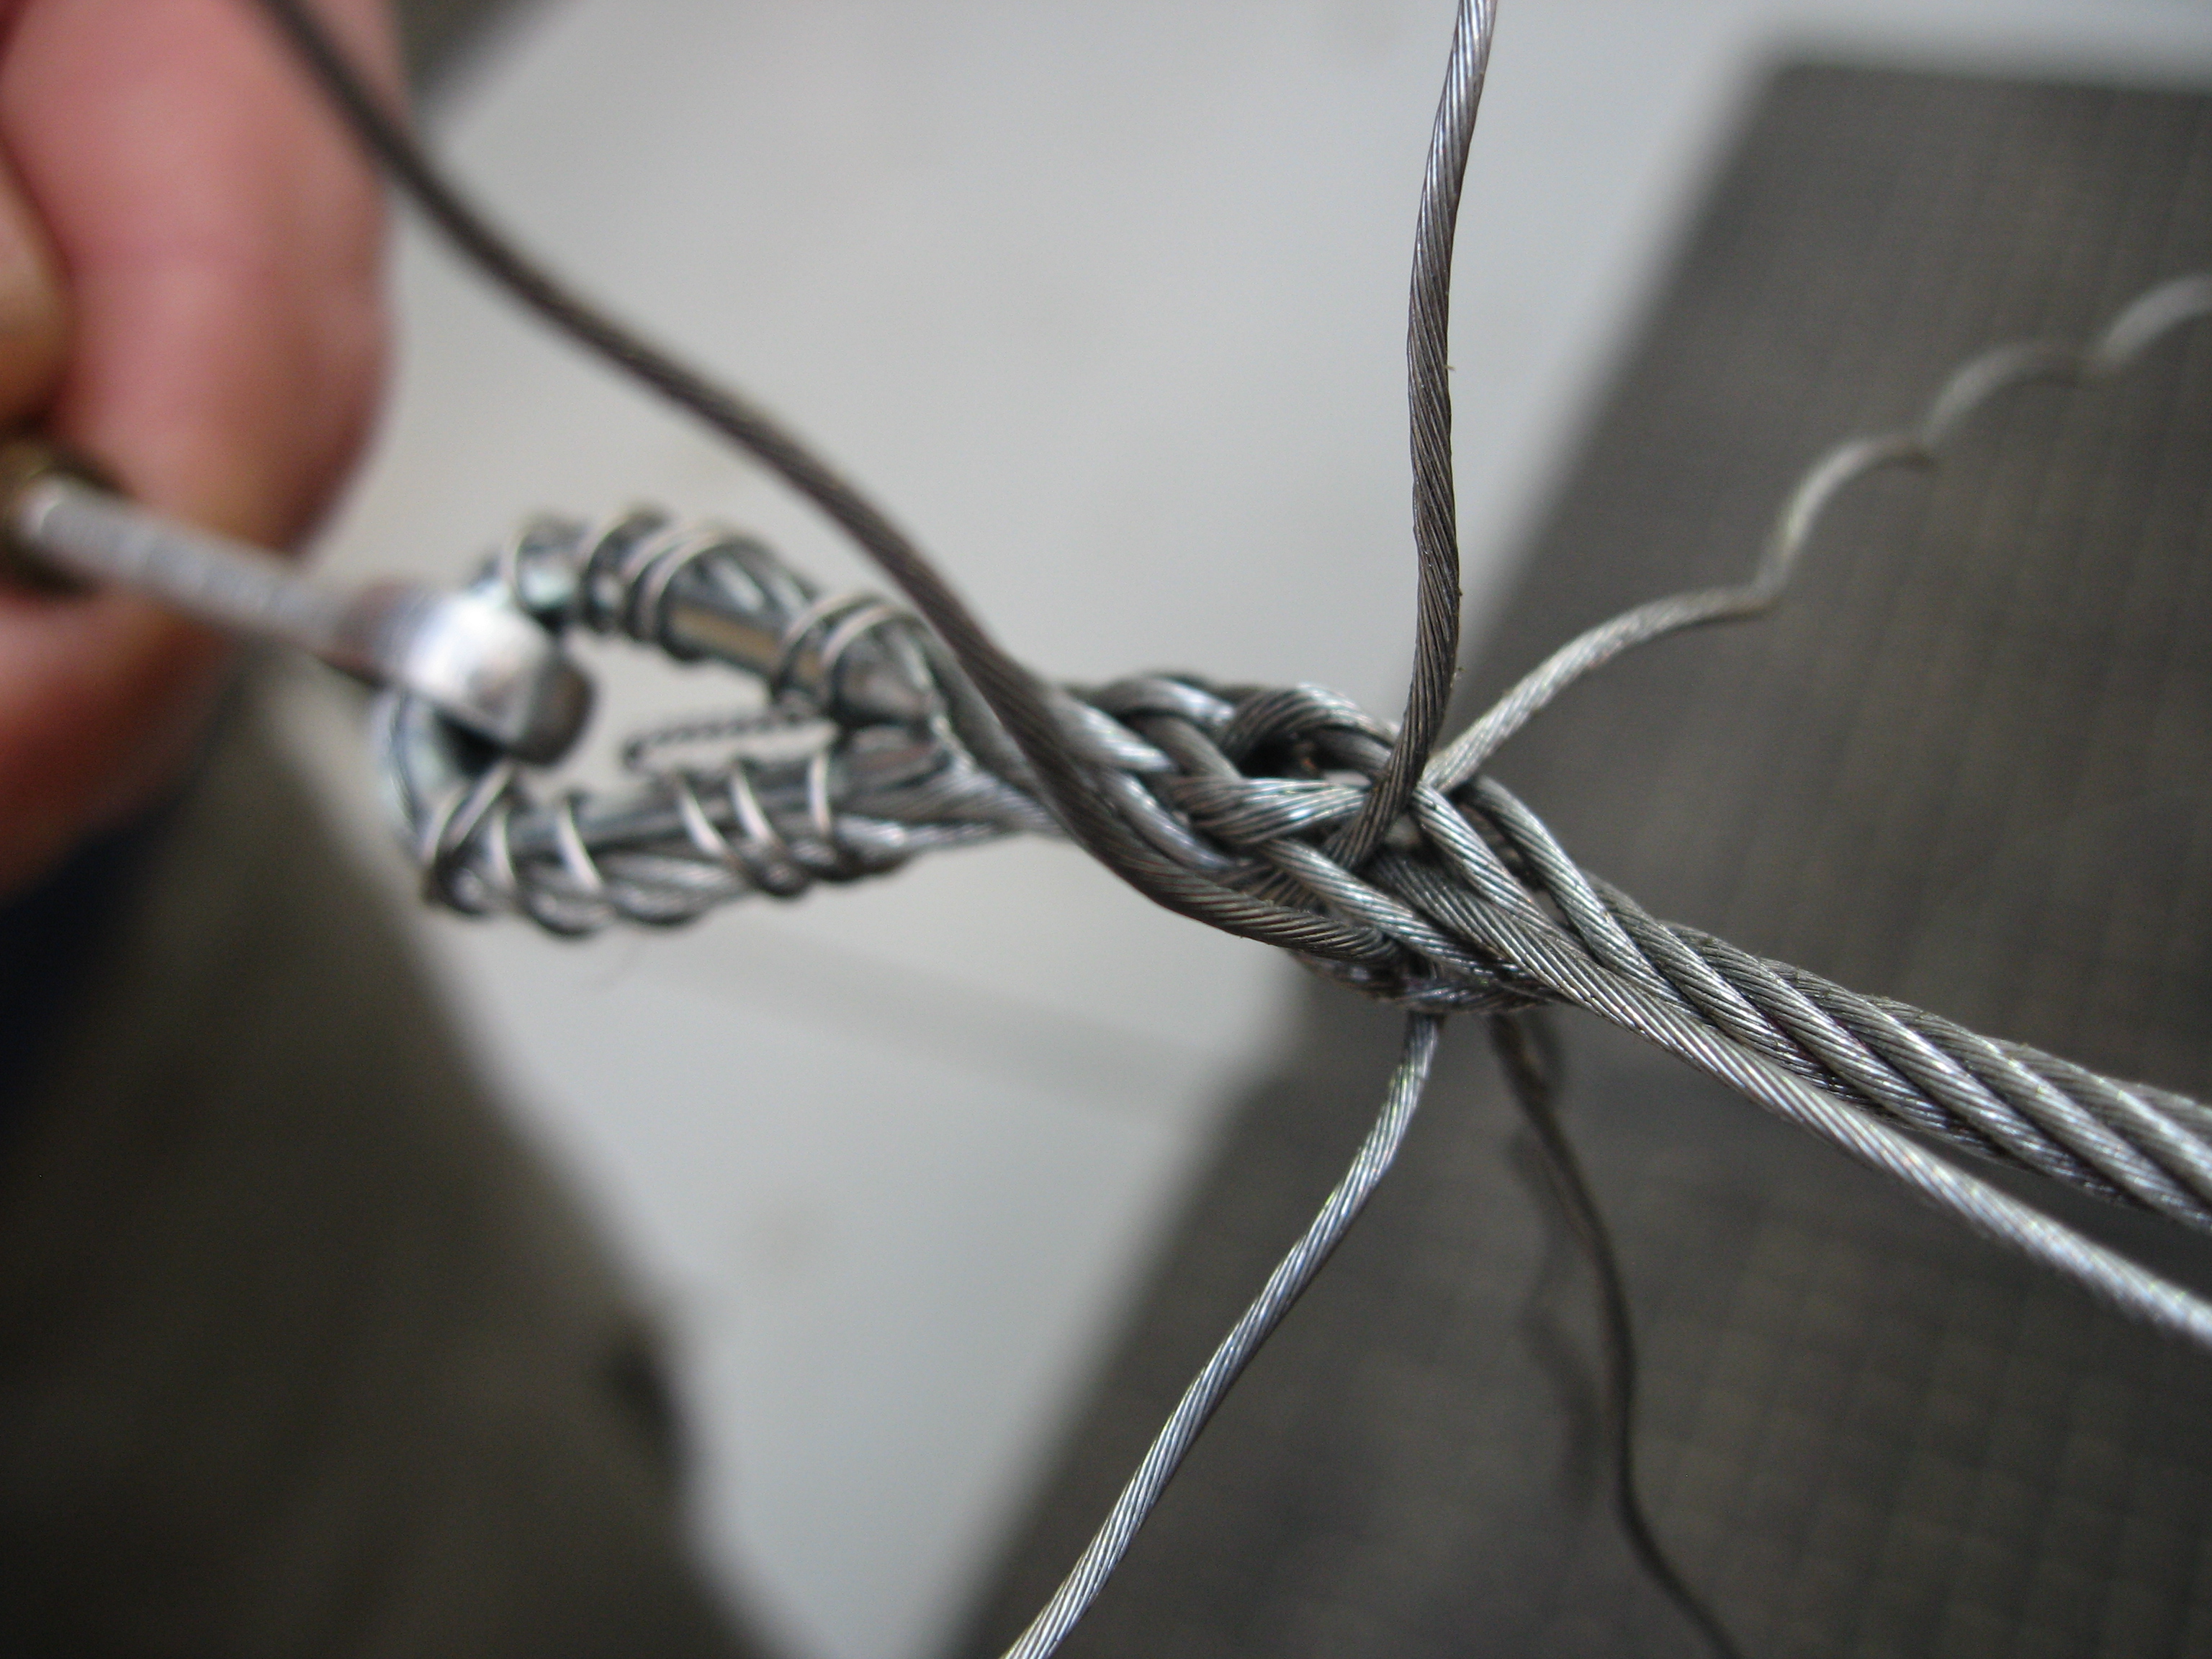
The splice starts by fixing the cable firmly onto the thimble that it will be formed around and separating the wires of the ‘tail’ of the cable, then using an Awl or similar pointed tool pry the wires on the other side of the thimble apart in a pre-determined sequence and threading the tails through. The heart wire tail is never actually woven at any stage, it is, in effect, laid alongside the heart wire inside the cable, and all the other wires are woven around about them. After the first ‘tuck’ is completed there will be one tail protruding from between each of the wires in the cable and also the heart wire will be protruding alongside one of these tails. At this point the wires pulled down firmly, and pressed to tighten them by using a pair of modified pliers.
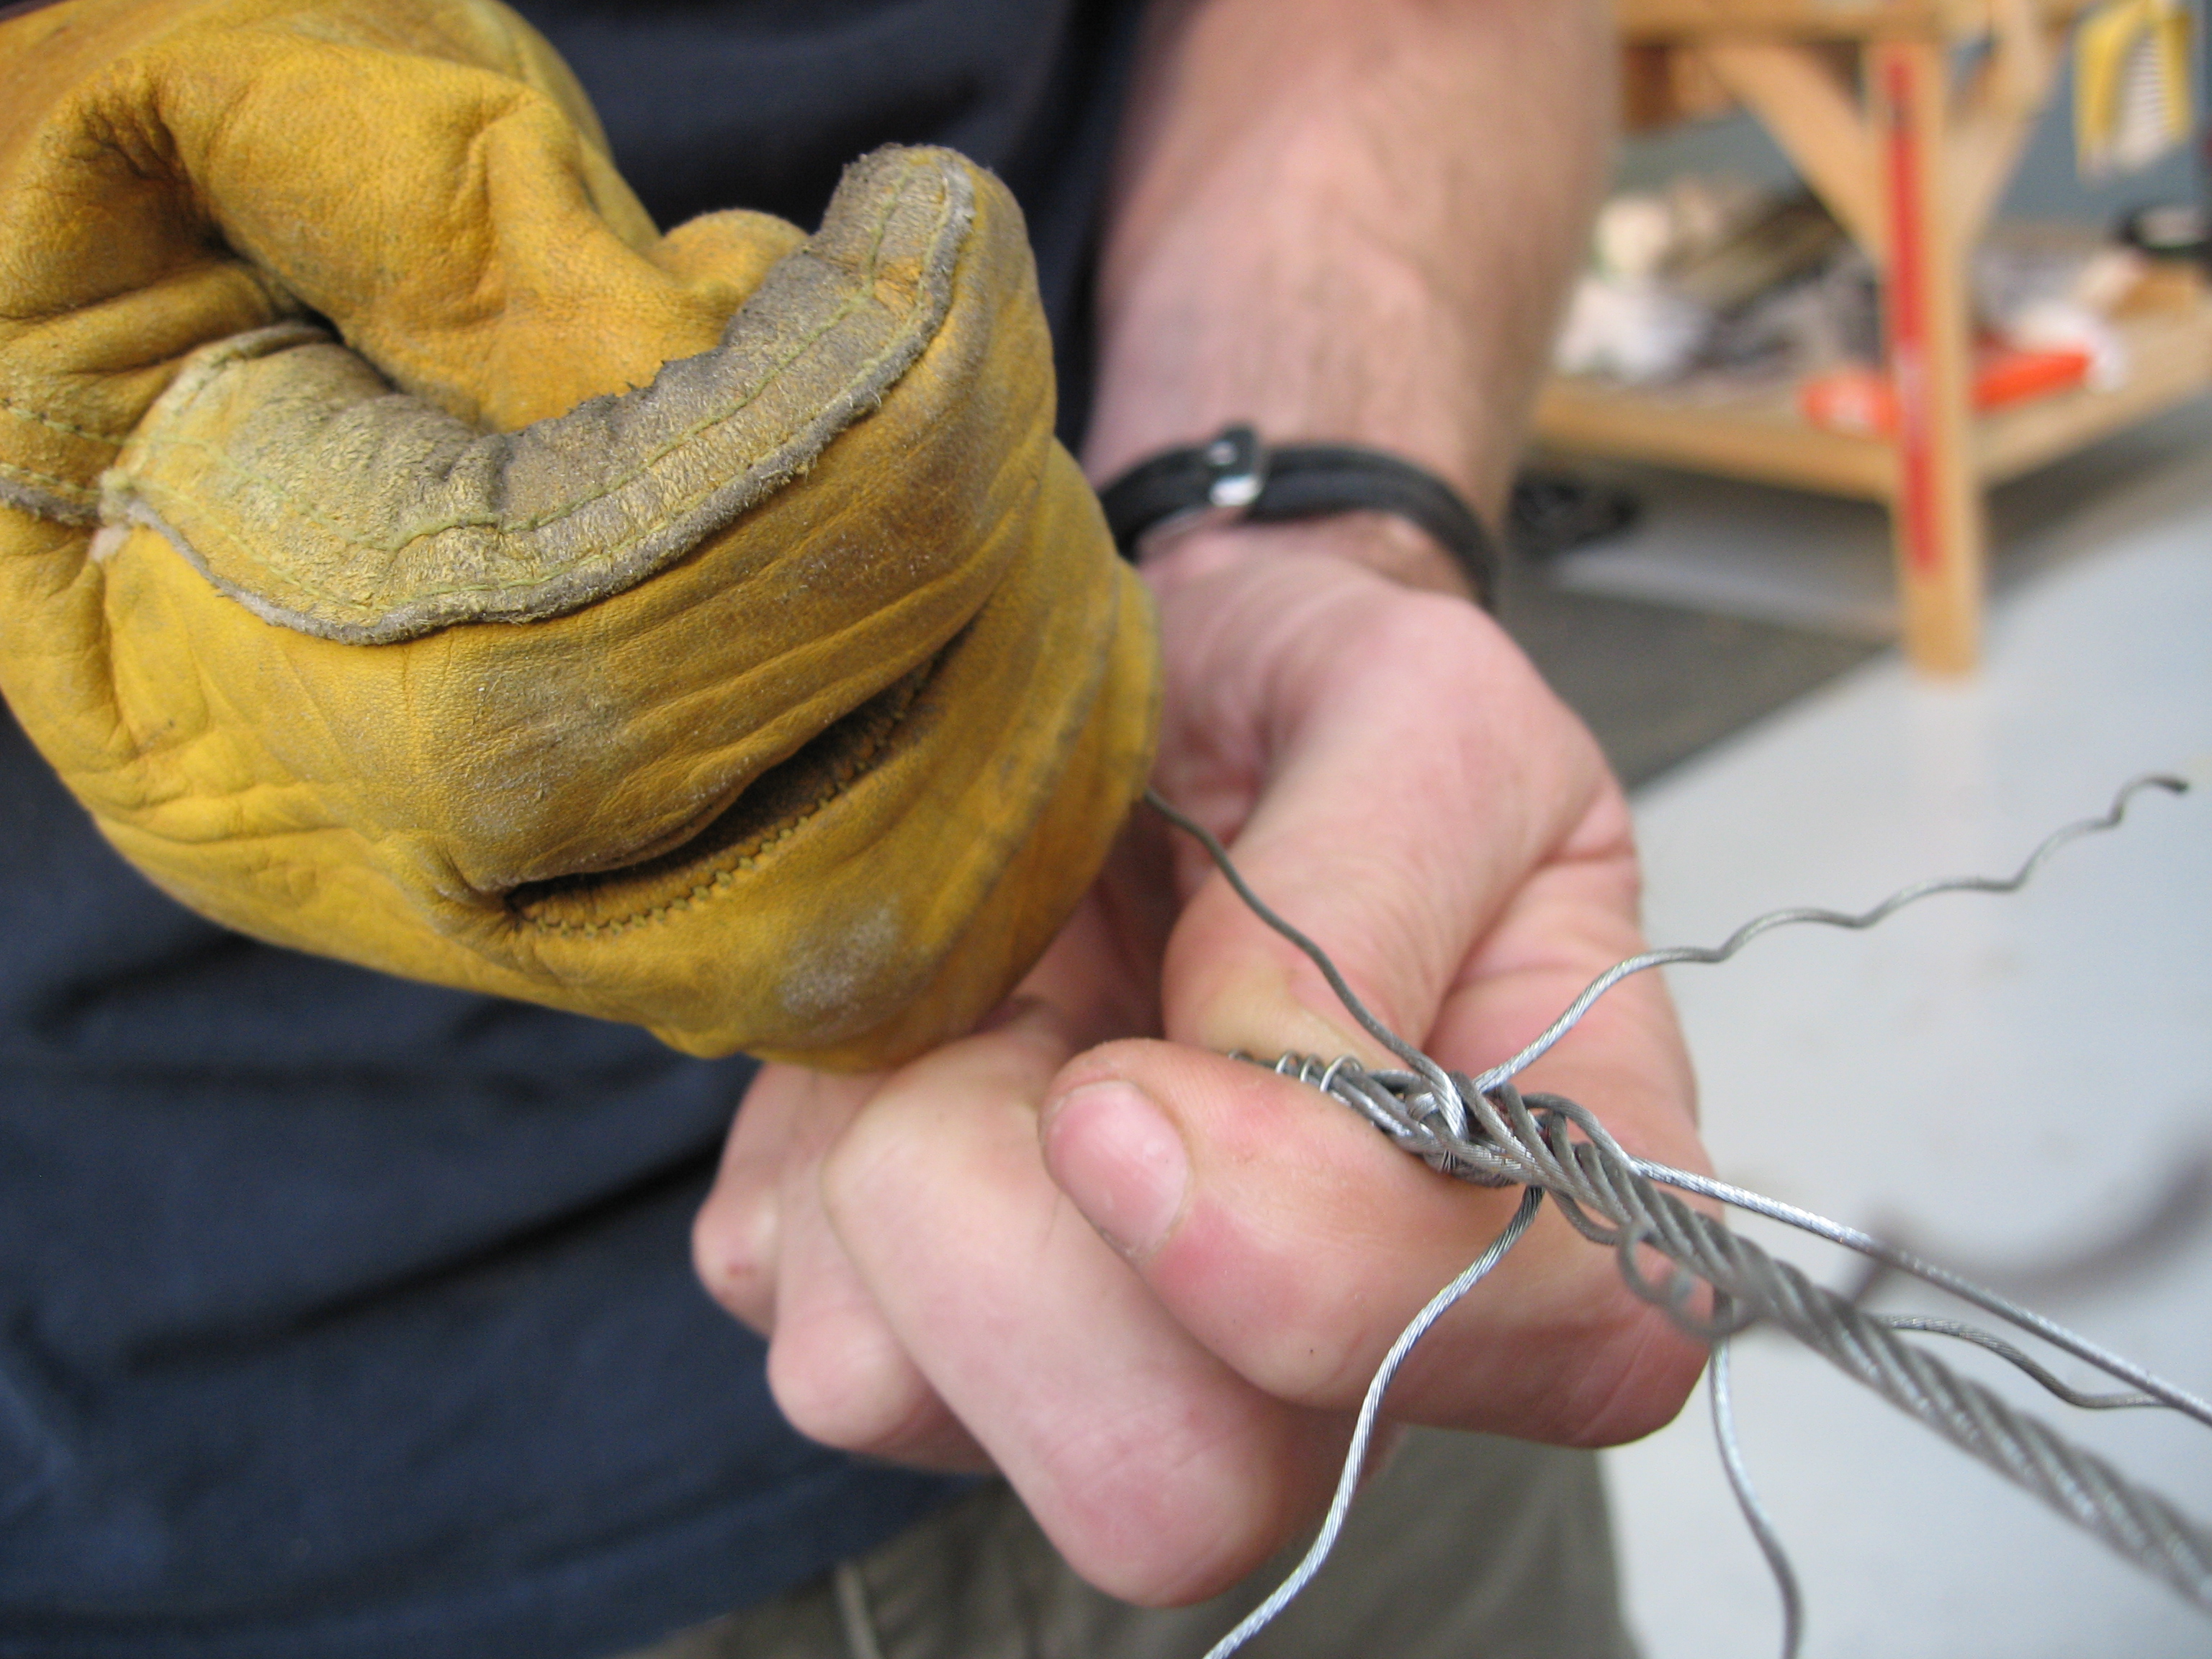
There may be a further three or four tucks required following this tuck depending on the type of splice and then a further one to three half tucks which help to spread out the end of the splice and also disperse any stress points. After each tuck is finished there will still be one tail protruding between each of the wires, also at the end of each tuck it is very important to pull the splice tight and then hammer it to bed the wires using a mallet and a hardwood block. Once the splice is completed the tails are cut off as close to the cable as possible and after a last hammering the splice is ‘served’ with either tying wire or string which keeps the splice neat and prevents loose sprags from catching.