Image gallery of the SE5a walkaround

“Admittedly the SE.5a was never a favorite of mine. It looked difficult to build and not particularly attractive, after all it has a nose that looks more like a dog house than a streamlined flying machine.”

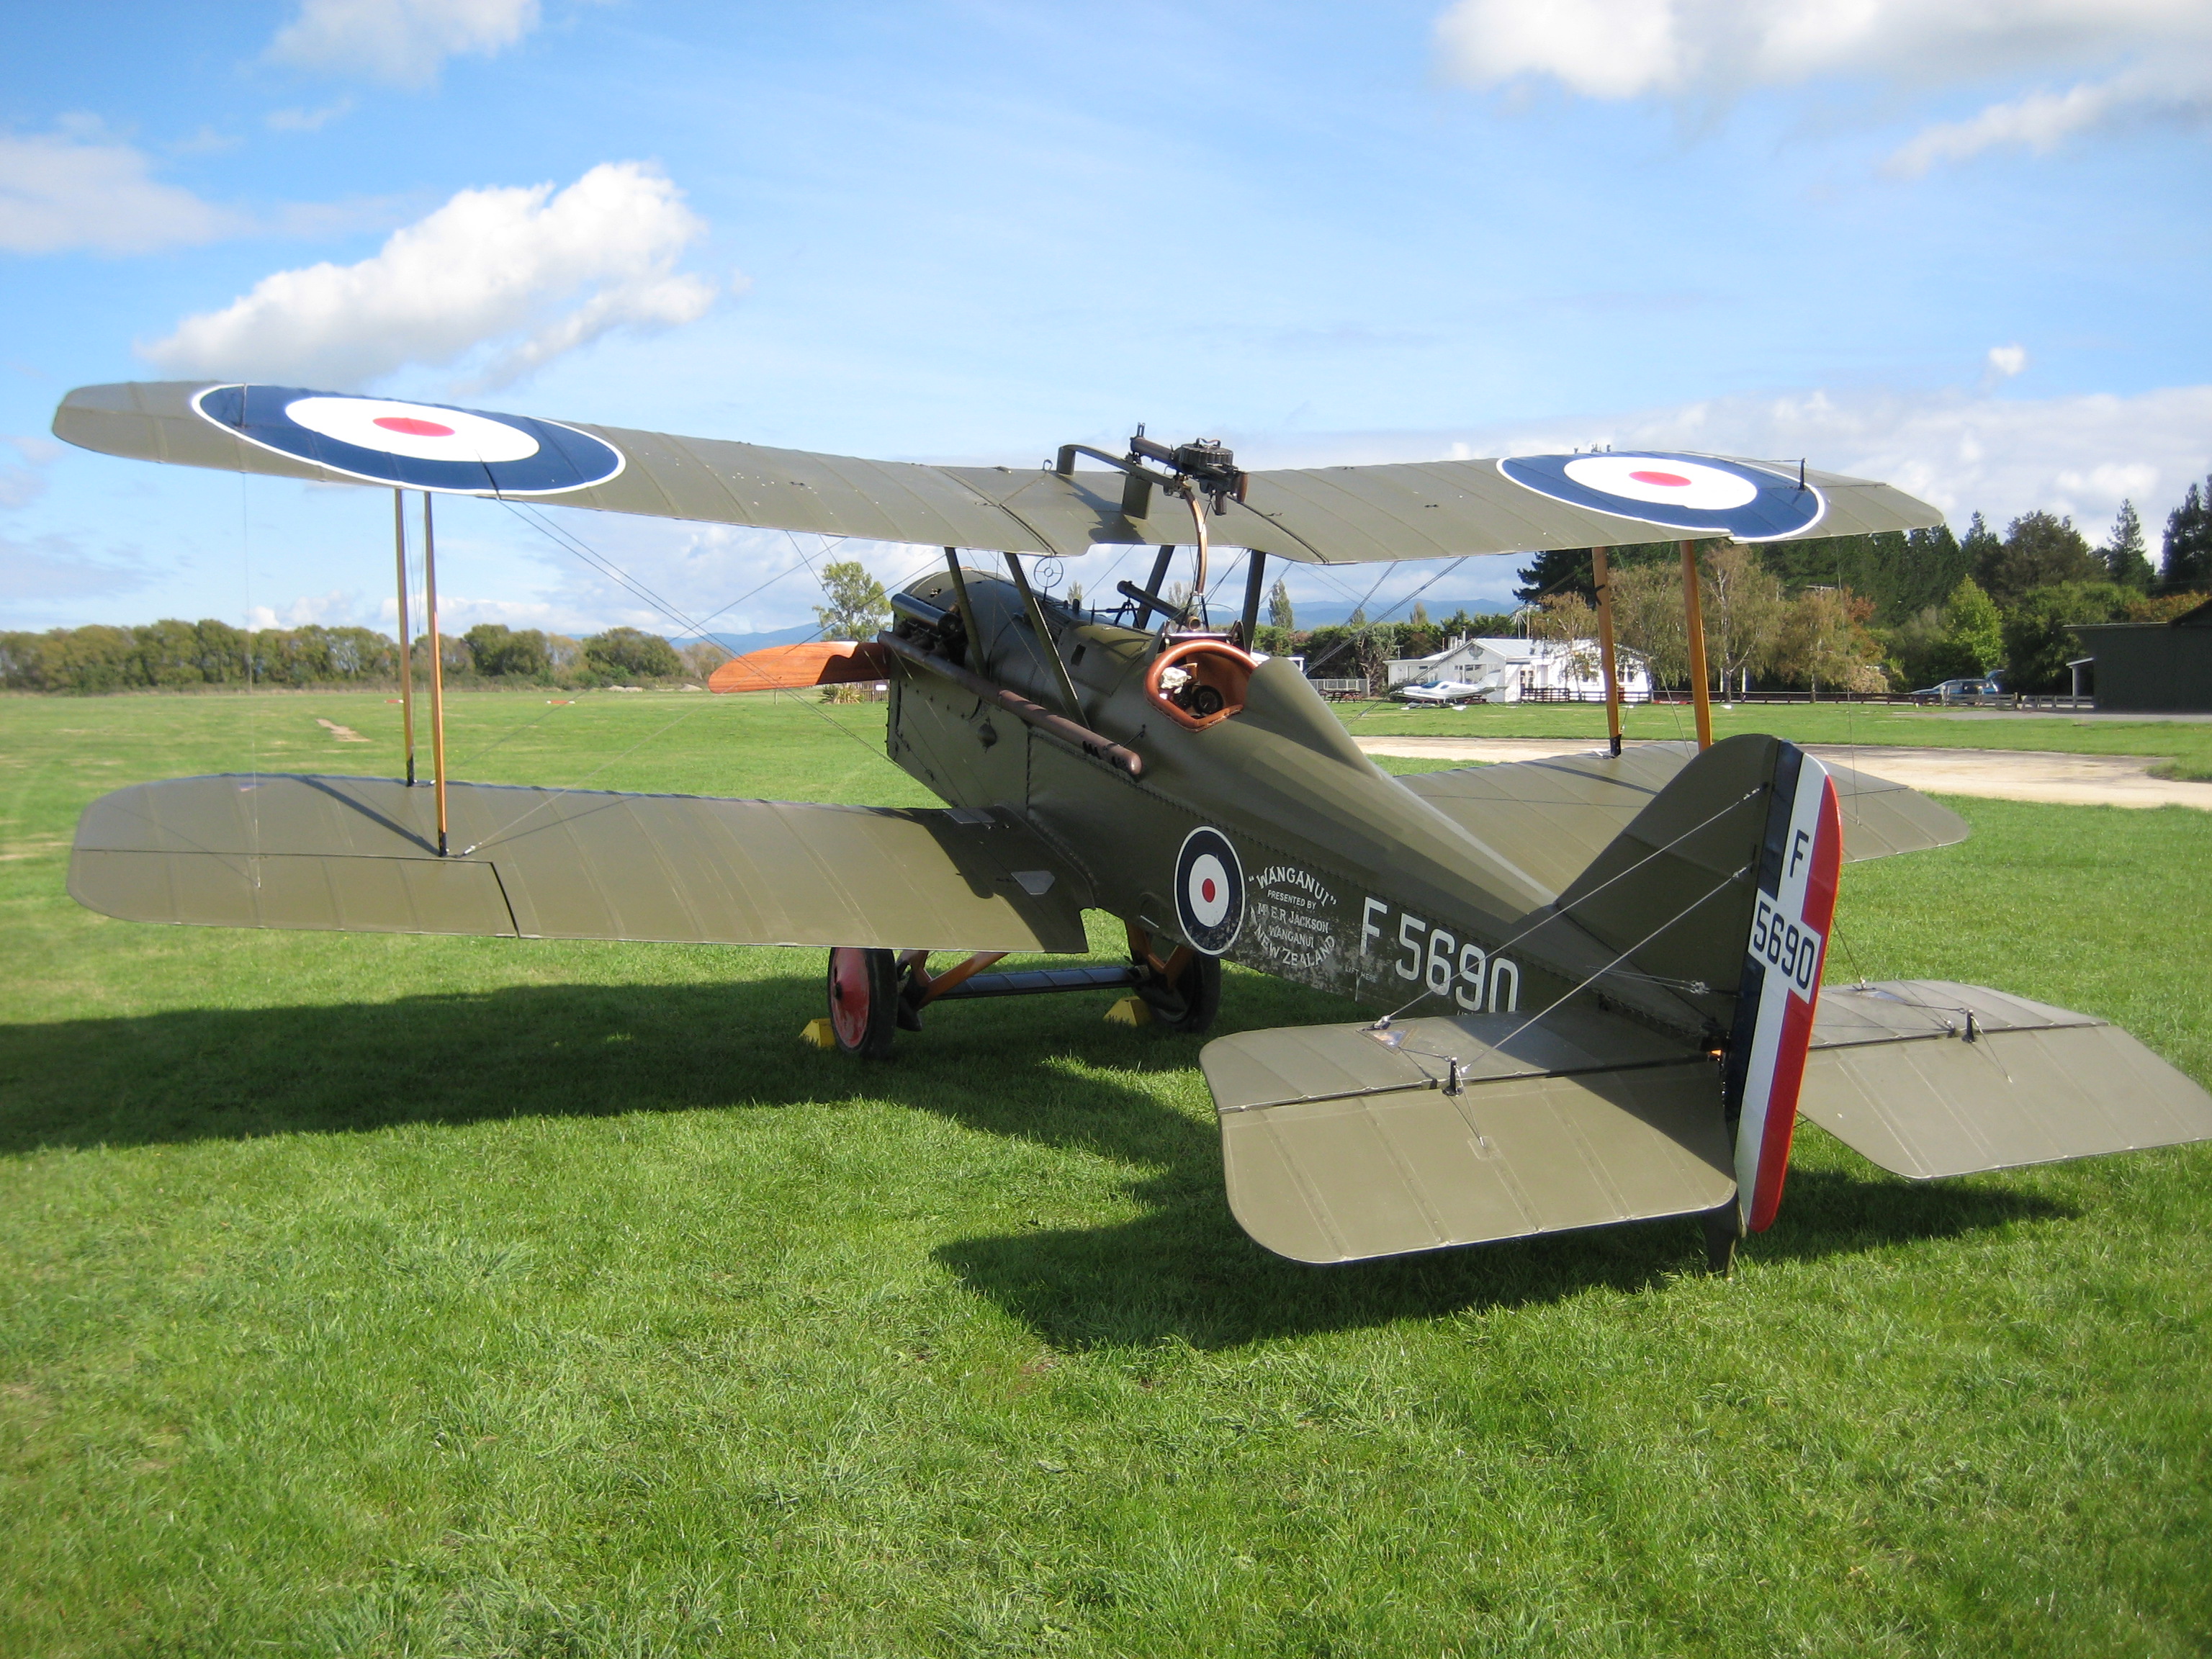
Not to mention the first prototype crashed when the wings failed! Square and boxy from any angle the airplane appears more primitive than it is. In fact it was produced late in the war and featured the first pilot adjustable tail-plane and a steerable tailskid. I was aware of its reputable performance and the many pilots who flew it successfully during the Great War; Albert Ball, James McCudden, and Edward Mannock. In fact, many regarded the SE.5a as the “Mount of Aces”.
By late 1916 early 1917 many people say the Rotary engine had reached its limit. As Rotary engines evolved, producing more horsepower and performance, the centrifugal forces on the engine and gyroscopic effect on the airframe became too large to manage. 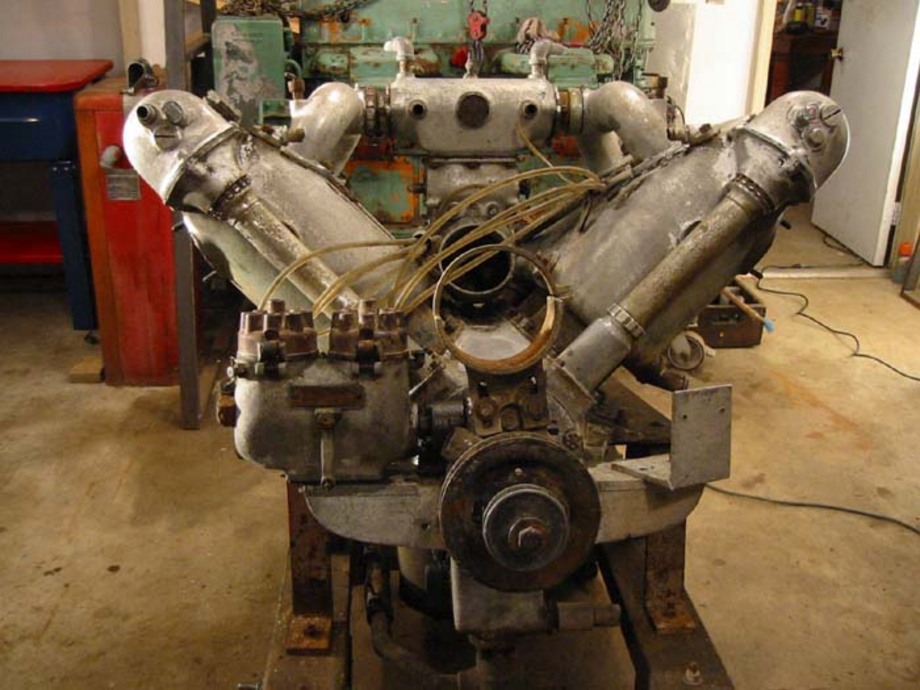 As the designs for aircraft developed and required more horsepower, new power-plants were sought.Having flown several Hispano-Suiza powered aircraft I was already a fan of the engine, perhaps the best power-plant of its day! I should mention that it is the direct drive version of the Hisso engine we are talking about.... the geared engines had a rash of difficulties as did some of the early direct-drive engines. The Hispano-Suiza engine was very advanced for its time, overhead cams, aluminum cylinder block with steel liners, dual ignition and forced lubrication that aided cooling. Most importantly - even the novice could operate the Hisso.
At the time the SE5a entered service, pilots were arriving at the Front with fewer than 20 hours of flying time, so a plane that could be flown by pilots of limited flying experience was very well accepted. There were far fewer accidents than those experienced with many of the Sopwith or Nieuport designs. While the highly maneuverable designs were better suited to skilled pilots with many hours of flight time, the SE.5a design was entirely different. Easy to fly, stable and forgiving, even a mediocre pilot could capitalize on the steadiness of the aircraft, firing at the enemy from further away with a greater degree of accuracy.
After years of construction and studying the aircrafts design, the features began to grow on me and I looked forward to the day I would be able to take an SE.5a into the air, to see how it performed first hand.
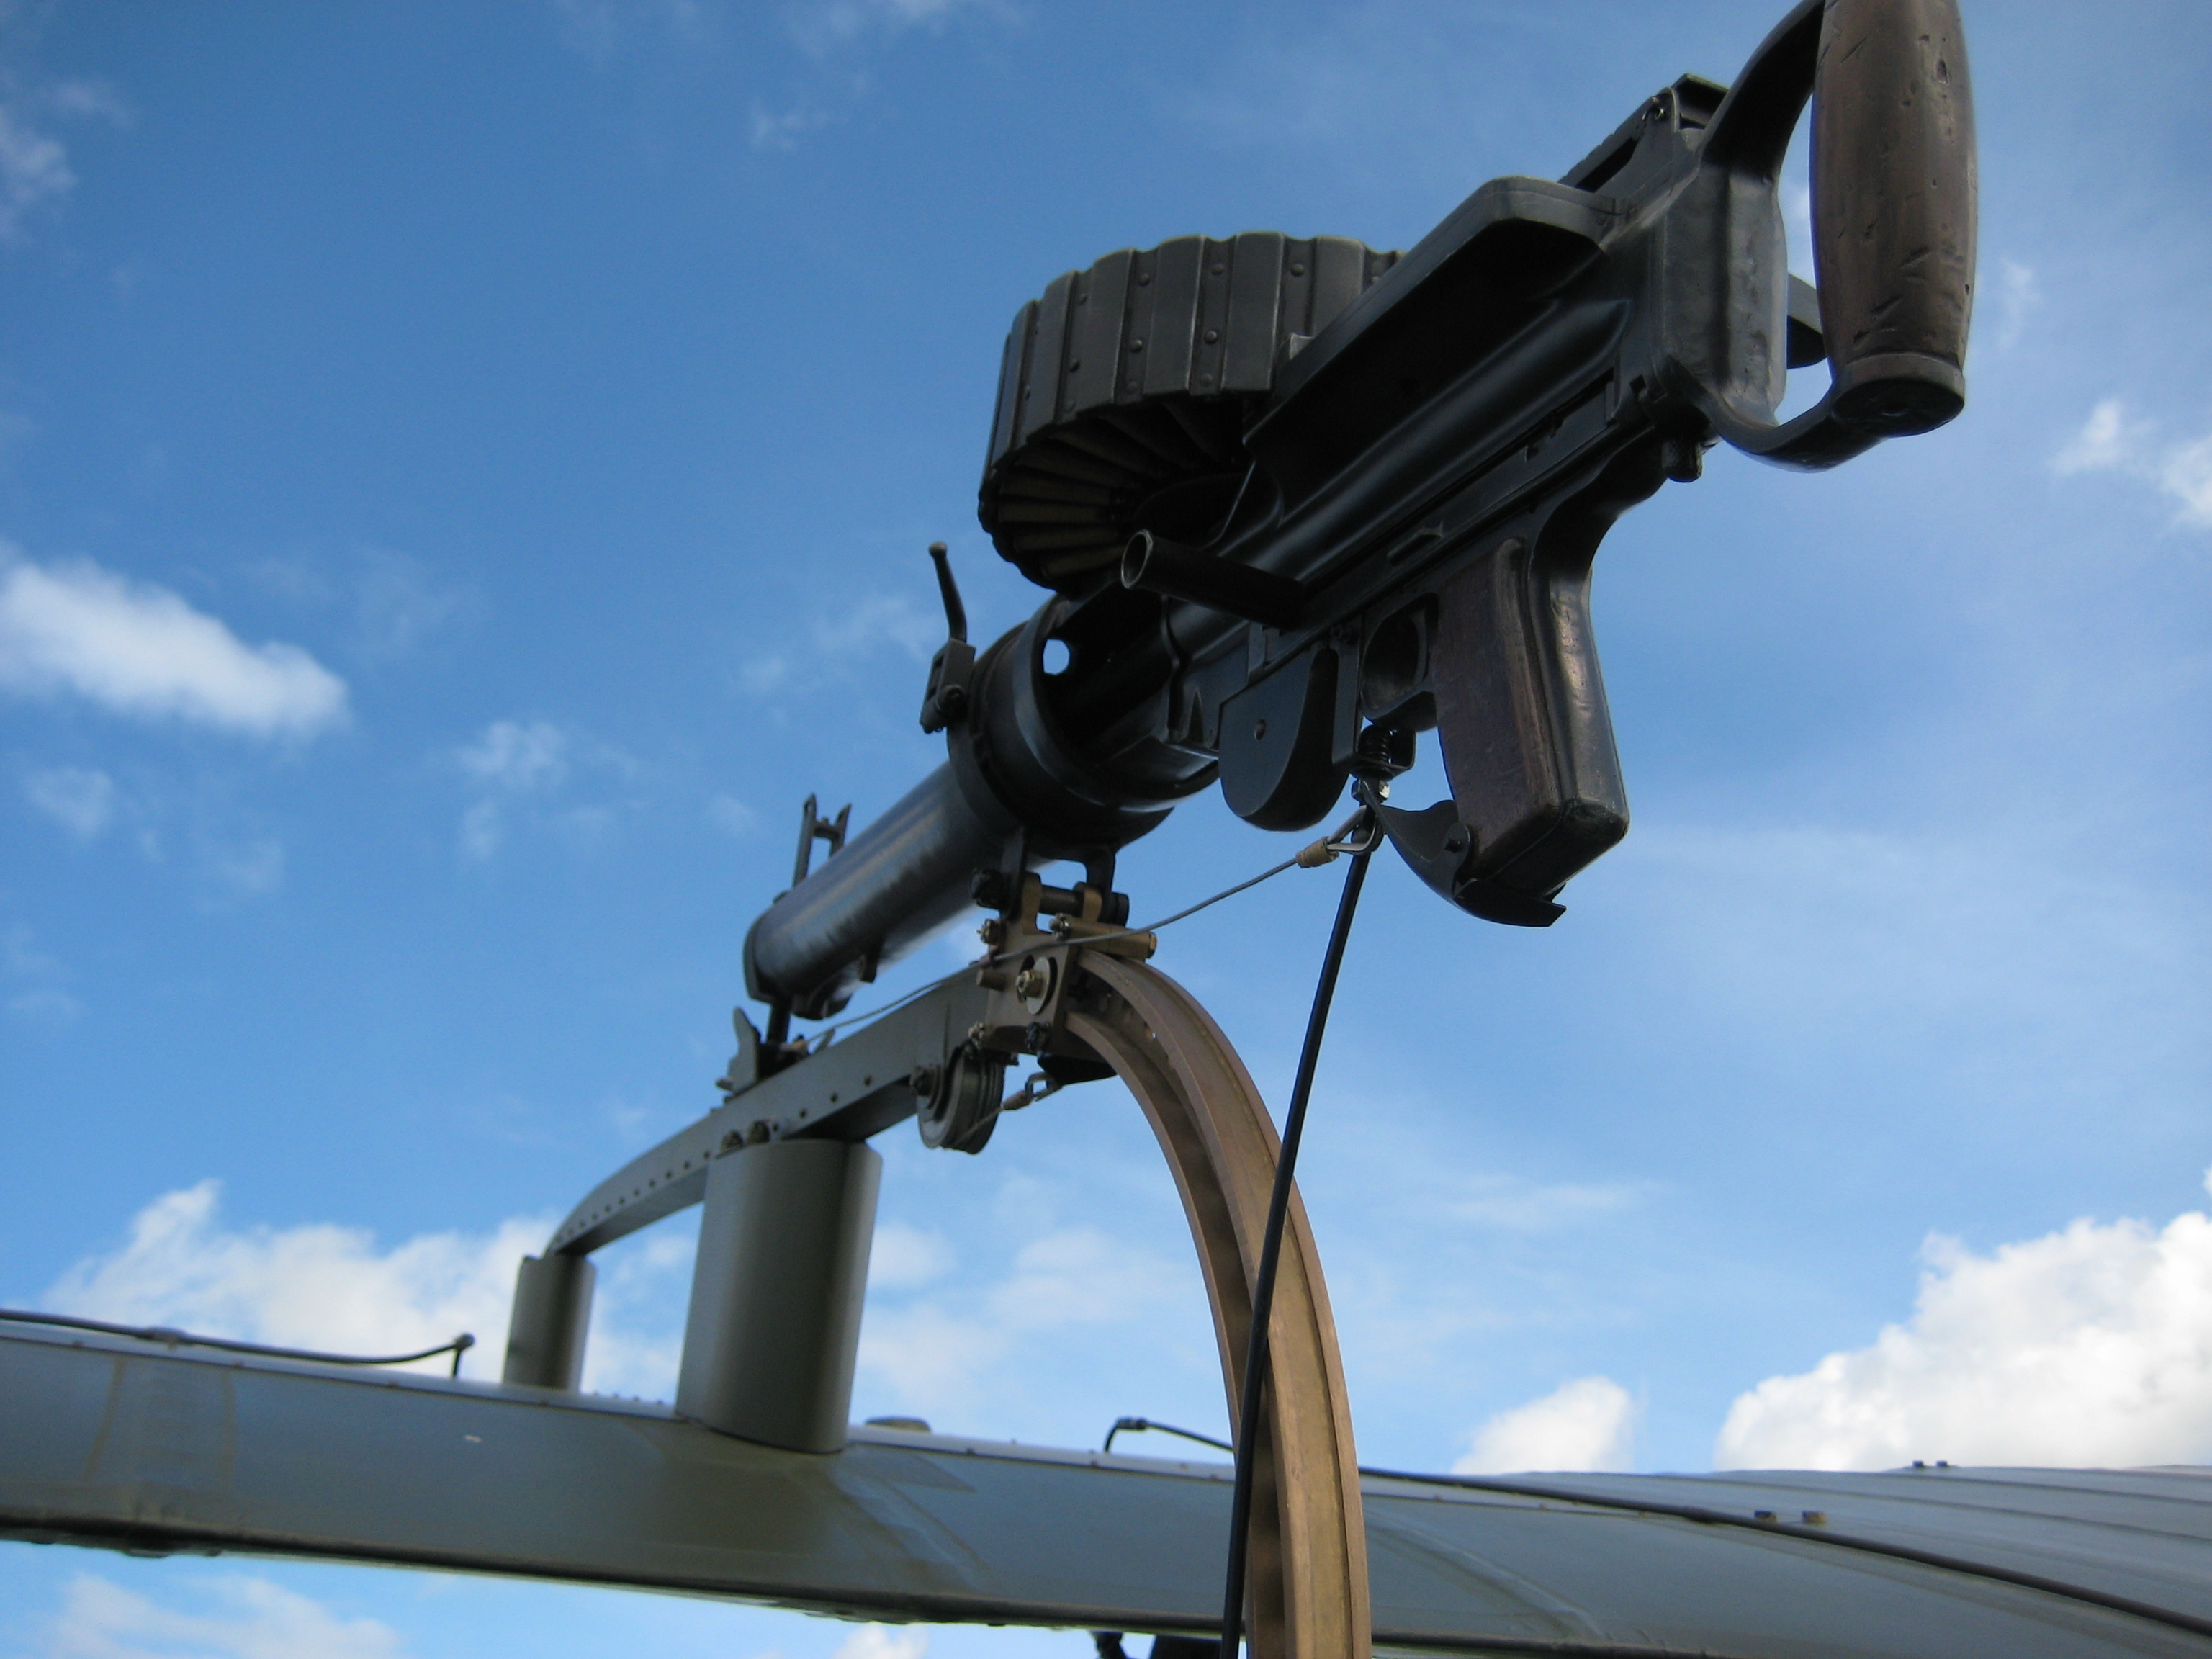
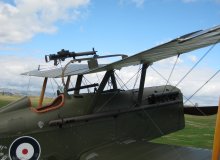
The SE.5a is equipped with both a Lewis machine gun mounted on the upper wing and a Vickers gun synchronized to fire through the propeller. The Vickers gun is faired into the forward cowling and protrudes into the cockpit. The guns are not only dangerous to enemy aircraft, they are also substantial obstacles when entering the cockpit!  Spare magazines for the Lewis gun also occupy the available free space in the cockpit, one magazine just forward of the control stick and the other directly in front of the pilot in the instrument panel. I doubt you could outmaneuver a Fokker Triplane or even a Sopwith Camel in an SE.5a. Its inherent stability meant it was not the most agile of competitors but you could go fast and shoot straight with it.
Even with the drag of the over-wing Foster gun mount, the 180 Hispano Suiza direct drive engine’s exhaust stacks, cylinders partially exposed and the rather blunt nose, the planes top speed is a respectable 115 mph. The SE5a provided the pilot with a very steady and strong gun platform that would hold together and get you to the fight. Paramount, it was very a reliable aircraft.

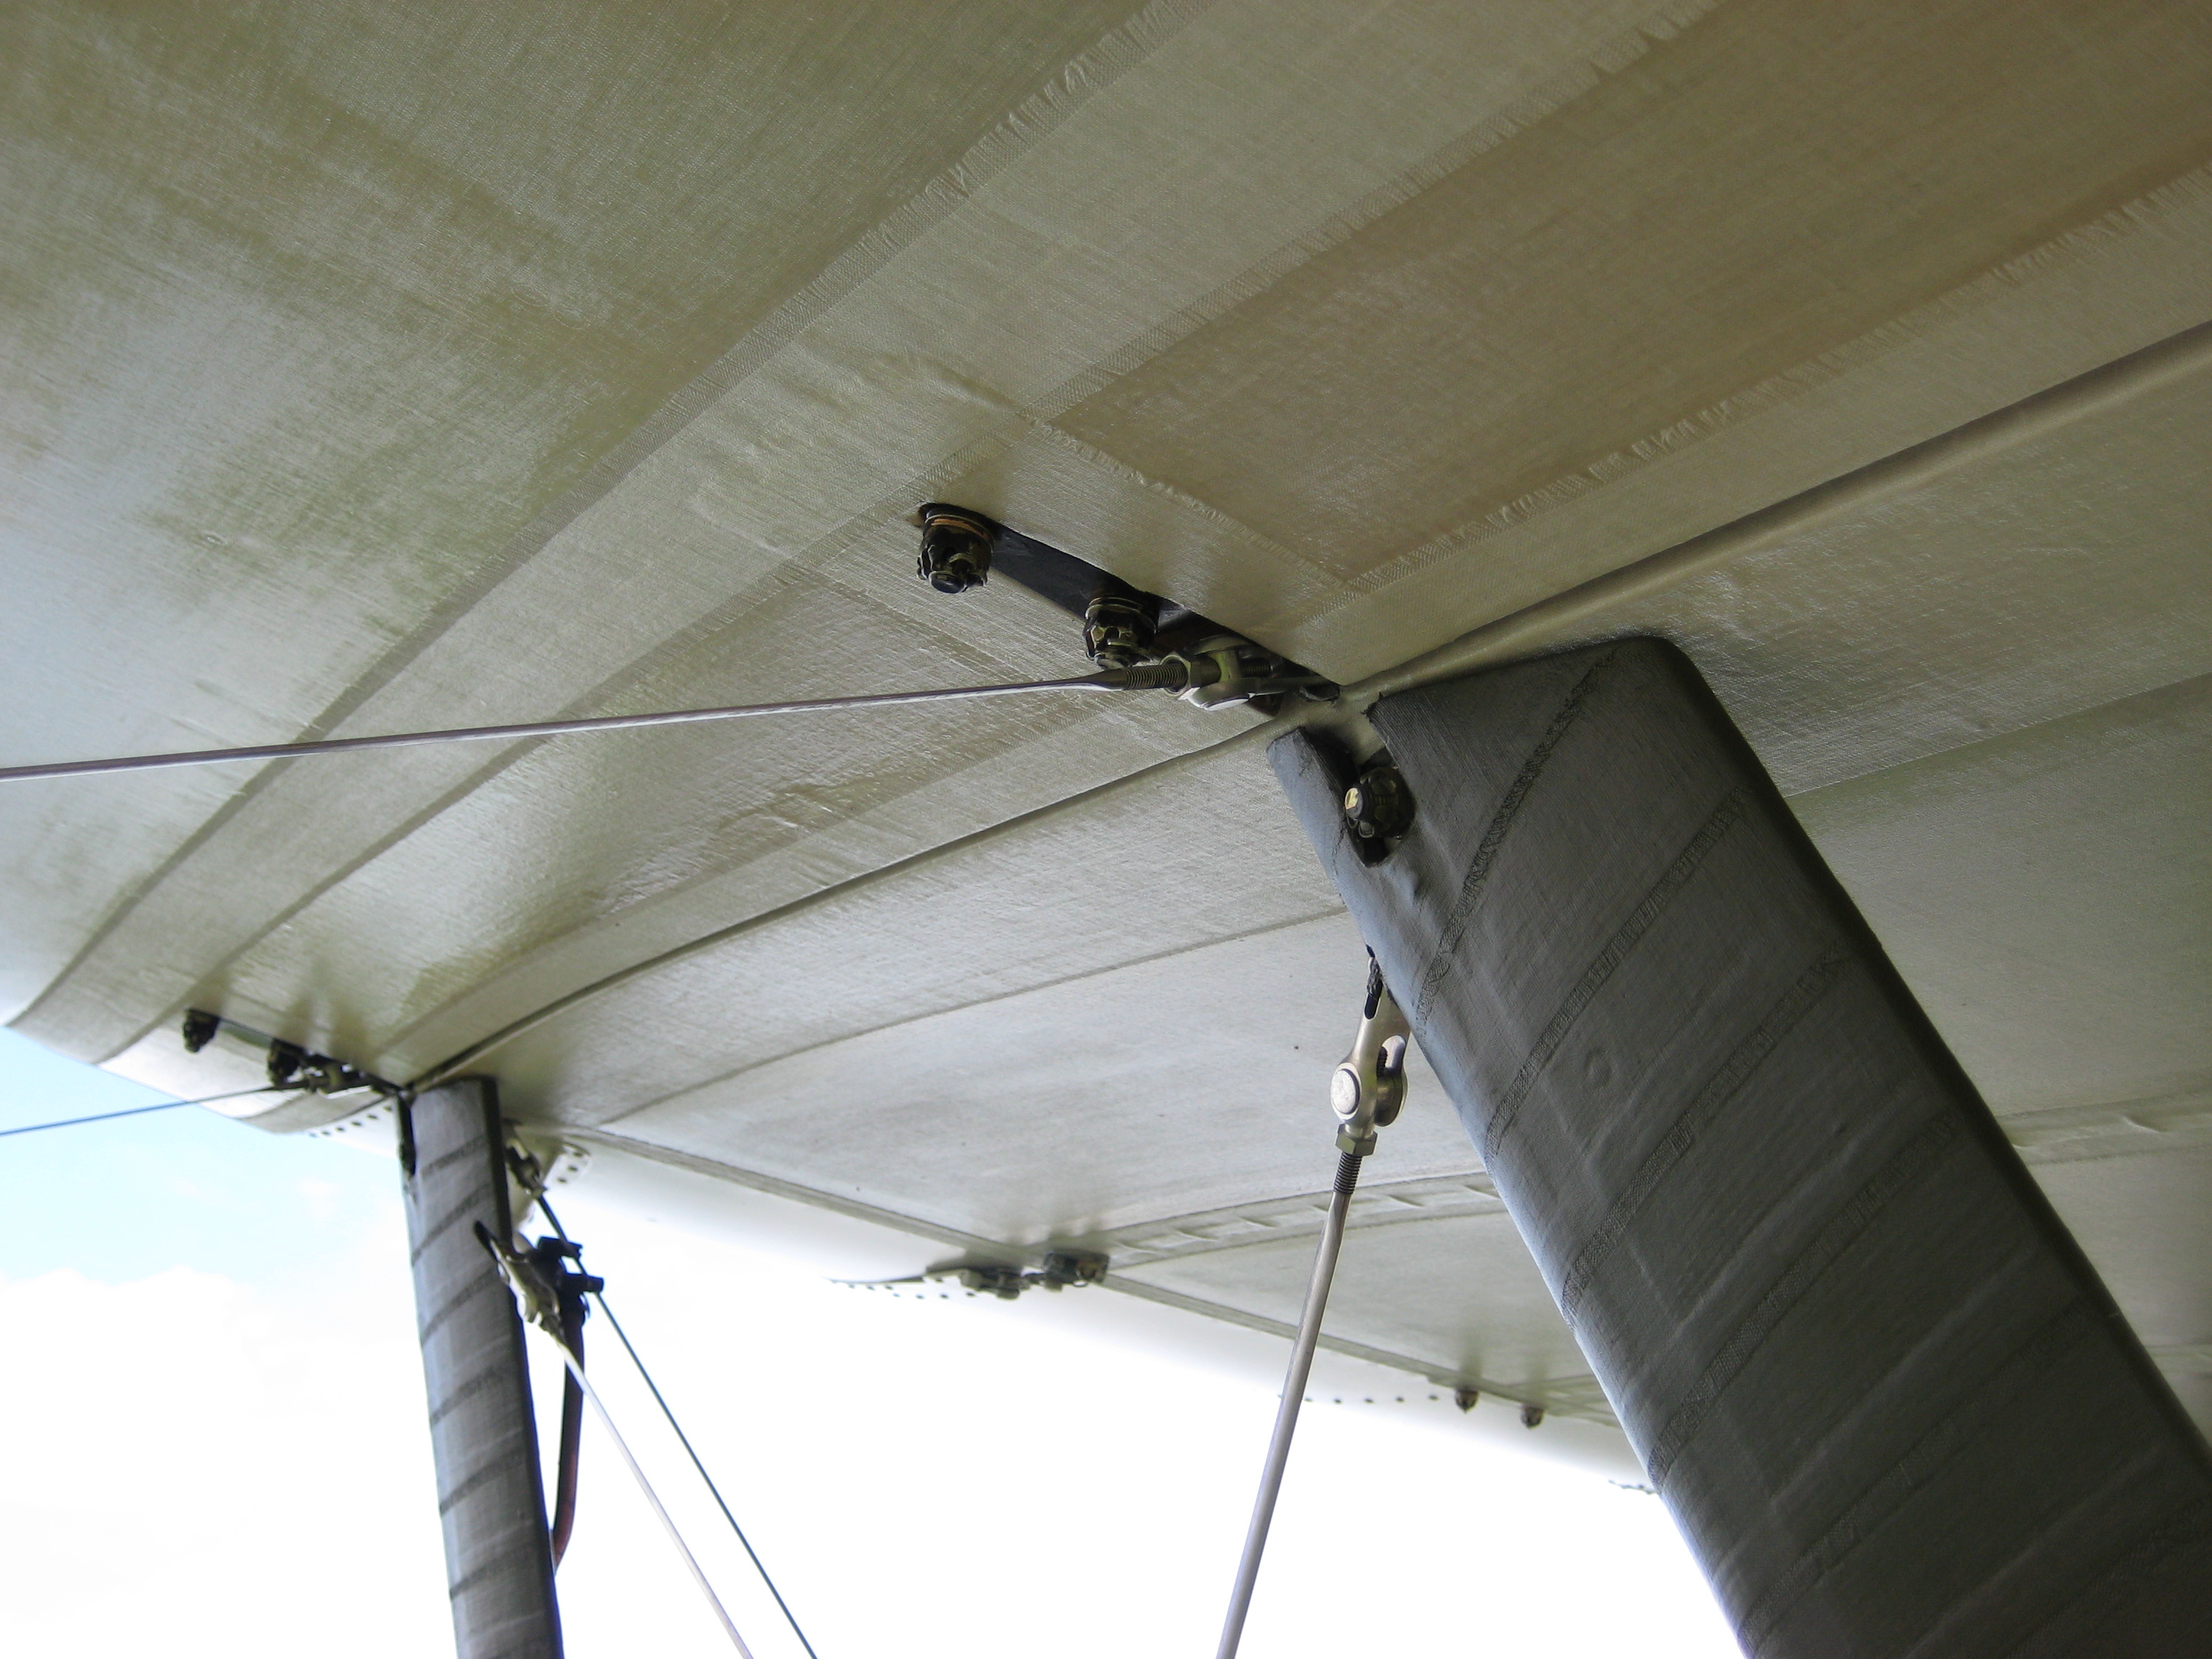
Being involved with the construction of four SE.5a’s, I was already aware of all of its systems and idiosyncrasies. Located in the leading edge of the center section is the expansion tank for the cooling system. If the engine runs hot and begins to overheat, the small drain tube that extends over the center section and ends at the trailing edge will be spewing coolant. In the same center section leading edge is the emergency fuel tank. There is no filler cap for this tank.
Fuel must be forced into it from the main tank using the engine driven air pump or the hand air pump to pressurize the main fuel tank and then selecting a position on the fuel selector which allows the fuel to flow uphill to the emergency tank. When it is full, another overflow tube that extends from the tank to the trailing edge will alert you!
During flight the fuel system is straight forward but one must be aware of several different settings. There is a fuel selector position that allows fuel to gravity feed from the center section tank in an emergency, this provides about fifteen minutes of flying time. There is also a setting on the "source" to allow you to switch from engine driven pump to the hand operated air pump in case of a failure of the engine driven pump.
Preflight of the SE.5a consists of the usual walk-around inspection, checking for abnormalities and defects as well as a few specific items. The two lower aileron control horns are susceptible to damage and must be carefully checked. The entire tailskid assembly is complex and also requires a close look and finally the main fuel tank and engine are checked. The oil level is checked through a small door on the left-hand fuselage side that provides access directly to the oil tank. The fuel tank is filled through the brass cap on the very top of the main fuel tank which incidentally forms the upper forward section of the fuselage. This tank has a small depression in it to allow for the Vickers gun to be fitted. As you lower yourself into the cockpit of the SE5a, it just feels right. Visibility is adequate, the controls are in the right place, the cockpit isn’t too large or too tight and as you take to the air you realize it isn’t all that noisy or even that windy.
The SE5a is user friendly right from the beginning, easy to inspect and ready for flight; easy to start and easy to fly. After the pilot is confident the aircraft is safe and ready for another flight, he climbs aboard, careful not to knock himself out by hitting the butt of the Lewis gun with his head. Once inside the cockpit you realize just how comfortable it is and that everything seems to be positioned just where you would want it. Although the visibility is adequate for a WWI type, there are all sorts of things in your immediate field of vision. 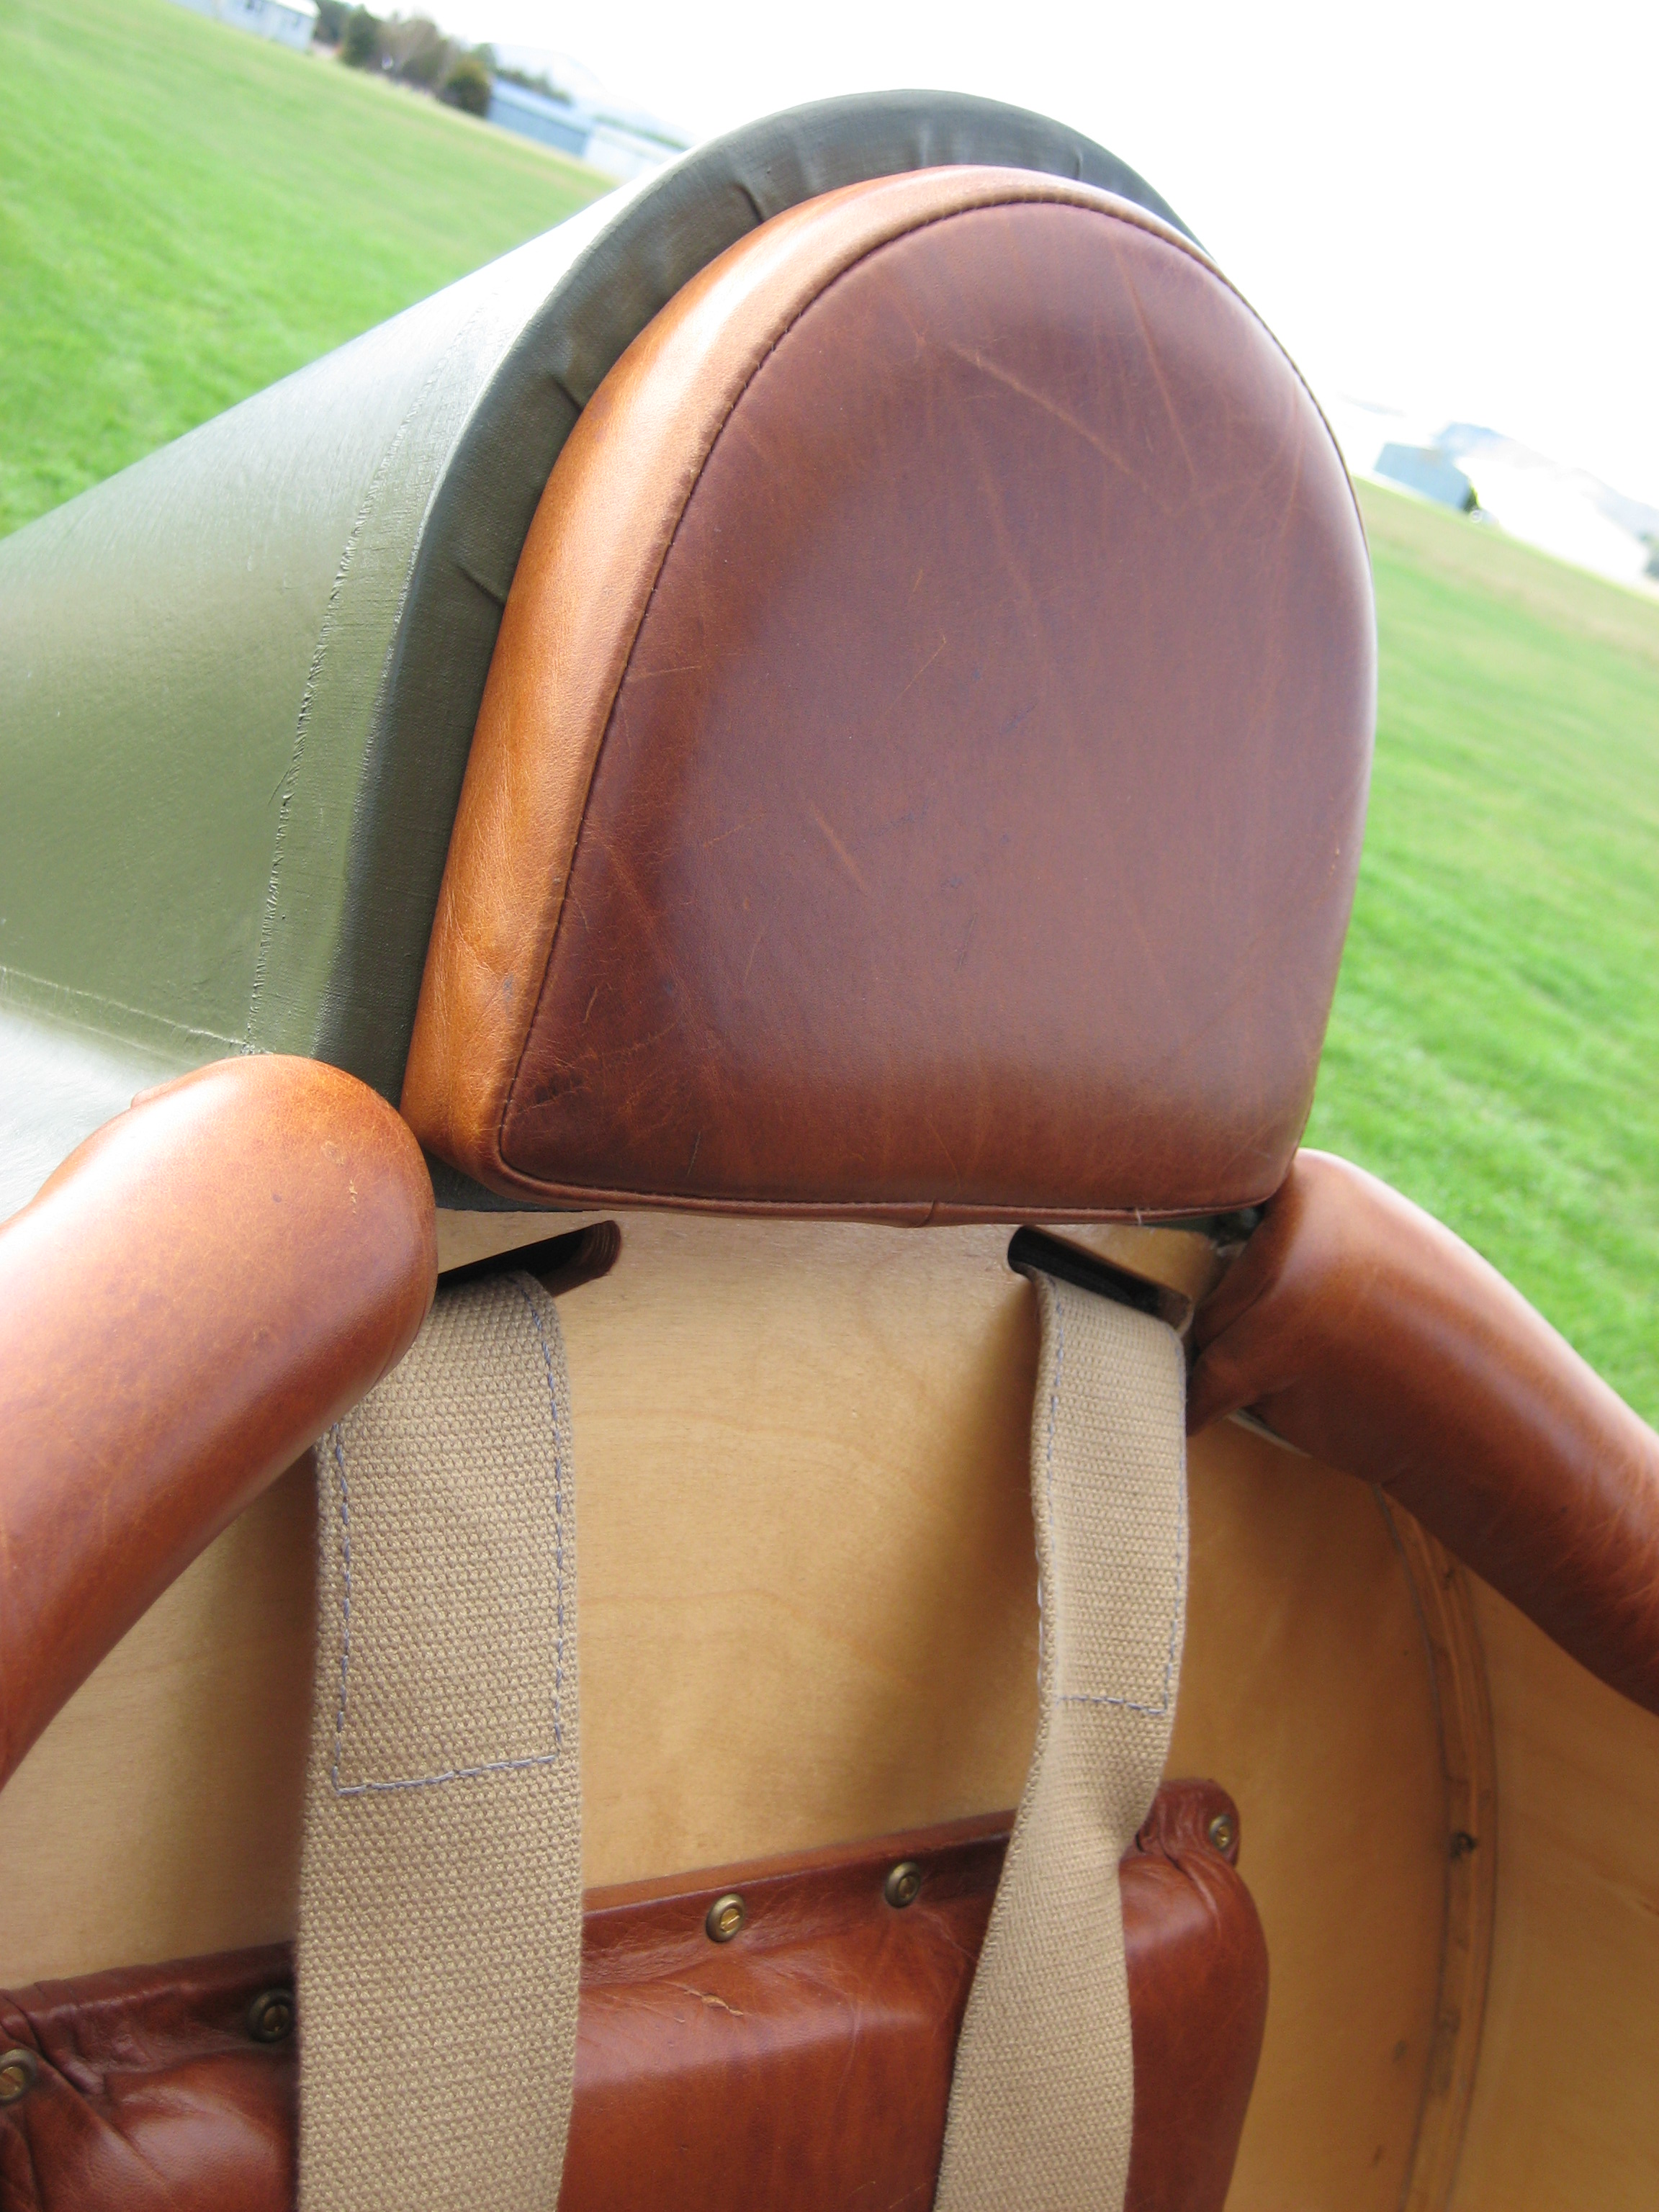 An Aldis sight for the Lewis gun, a ring and ball sight for the Vickers gun, windshield and its streamlined frame, the lower portion of the Foster gun mount, and the usual array of bracing wires. I am always a bit reluctant to fasten any safety belts or harnesses until the engine is “fired up” just in case it does just that! In this case however I am confident the Hisso won’t give any trouble and I fasten the Sutton harness and make the necessary adjustments and prepare to start the engine.
First thing to do is make sure both magneto switches are in the Off position, then pressurize the fuel system by selecting the hand pump instead of the engine driven pump and start pumping. If the tank is full it will only require a dozen or so pumps to reach the necessary pressure (1.5 PSI). At this point an engineer would be preparing to prime the engine with raw fuel through small brass priming cups located on the intake manifold. Once the engine is primed and pulled through several revolutions with the switches off it is ready start.
 Starting is rather easy once the system is learned and as always every aircraft seems to have its own process. In this case, once primed we simply select both magnetos and also select the booster magneto on and keep clear of the prop. Then the pilot winds the booster magneto and if we are lucky the engine comes to life on its own without the need to swing the propeller!
  If it doesn’t, we must resort to the usual “Armstrong” starter, where the engineer must swing the prop by hand. The Hisso is usually very easy to start and settles down to a high idle immediately while the coolant warms up and the pressure selector is switched to the engine driven air pump. To aid warming up the engine, the radiator shutters should be placed in the closed position with the small lever on the left-hand side of the cockpit. Once the temperature reaches about 60 degrees Celsius you are ready to run the engine up, check the magnetos and make sure the engine driven air pump is working.

If everything is in order, I call for chocks to be removed and taxi to the take off point. The SE5a handles well on the ground; it is equipped with a steerable tailskid, responsive engine and effective rudder. The only thing to be mindful of is it feels a bit heavy on the ground and can pick up speed rather quickly. Without brakes of any kind the laws of physics take over and you soon learn that “Every object in a state of uniform motion tends to remain in that state of motion unless an external force is applied to it.” That being said even the newest pilot could get the SE5a to the runway. Ready for take-off there isn’t much to do other than check the temperatures and pressures, point into the wind and open the throttle. Acceleration is steady and you realize how much power the Hiss actually develops. The boxy angular ship is airborne at about 50 mph and immediately you realize looks aren’t everything - this airplane really feels good. The controls are crisp and responsive although heavier than the Sopwith Camel or Triplane or even the Fokker Triplane. The engine is smooth and quieter than I expected it to be with those exhaust stacks running alongside the cockpit terminating a few feet from the pilots ears. A quick scan of the instruments shows everything is operating where it should be, perhaps open the radiator shutters a bit to keep the coolant in the optimum range and pull the throttle back to a cruise setting of 1600 RPM which gives about 95 mph .
To get a better feel for what this airplane can do, steep turns, lazy eights and wingovers are attempted, all easily carried out but an excessive amount of adverse yaw is experienced. 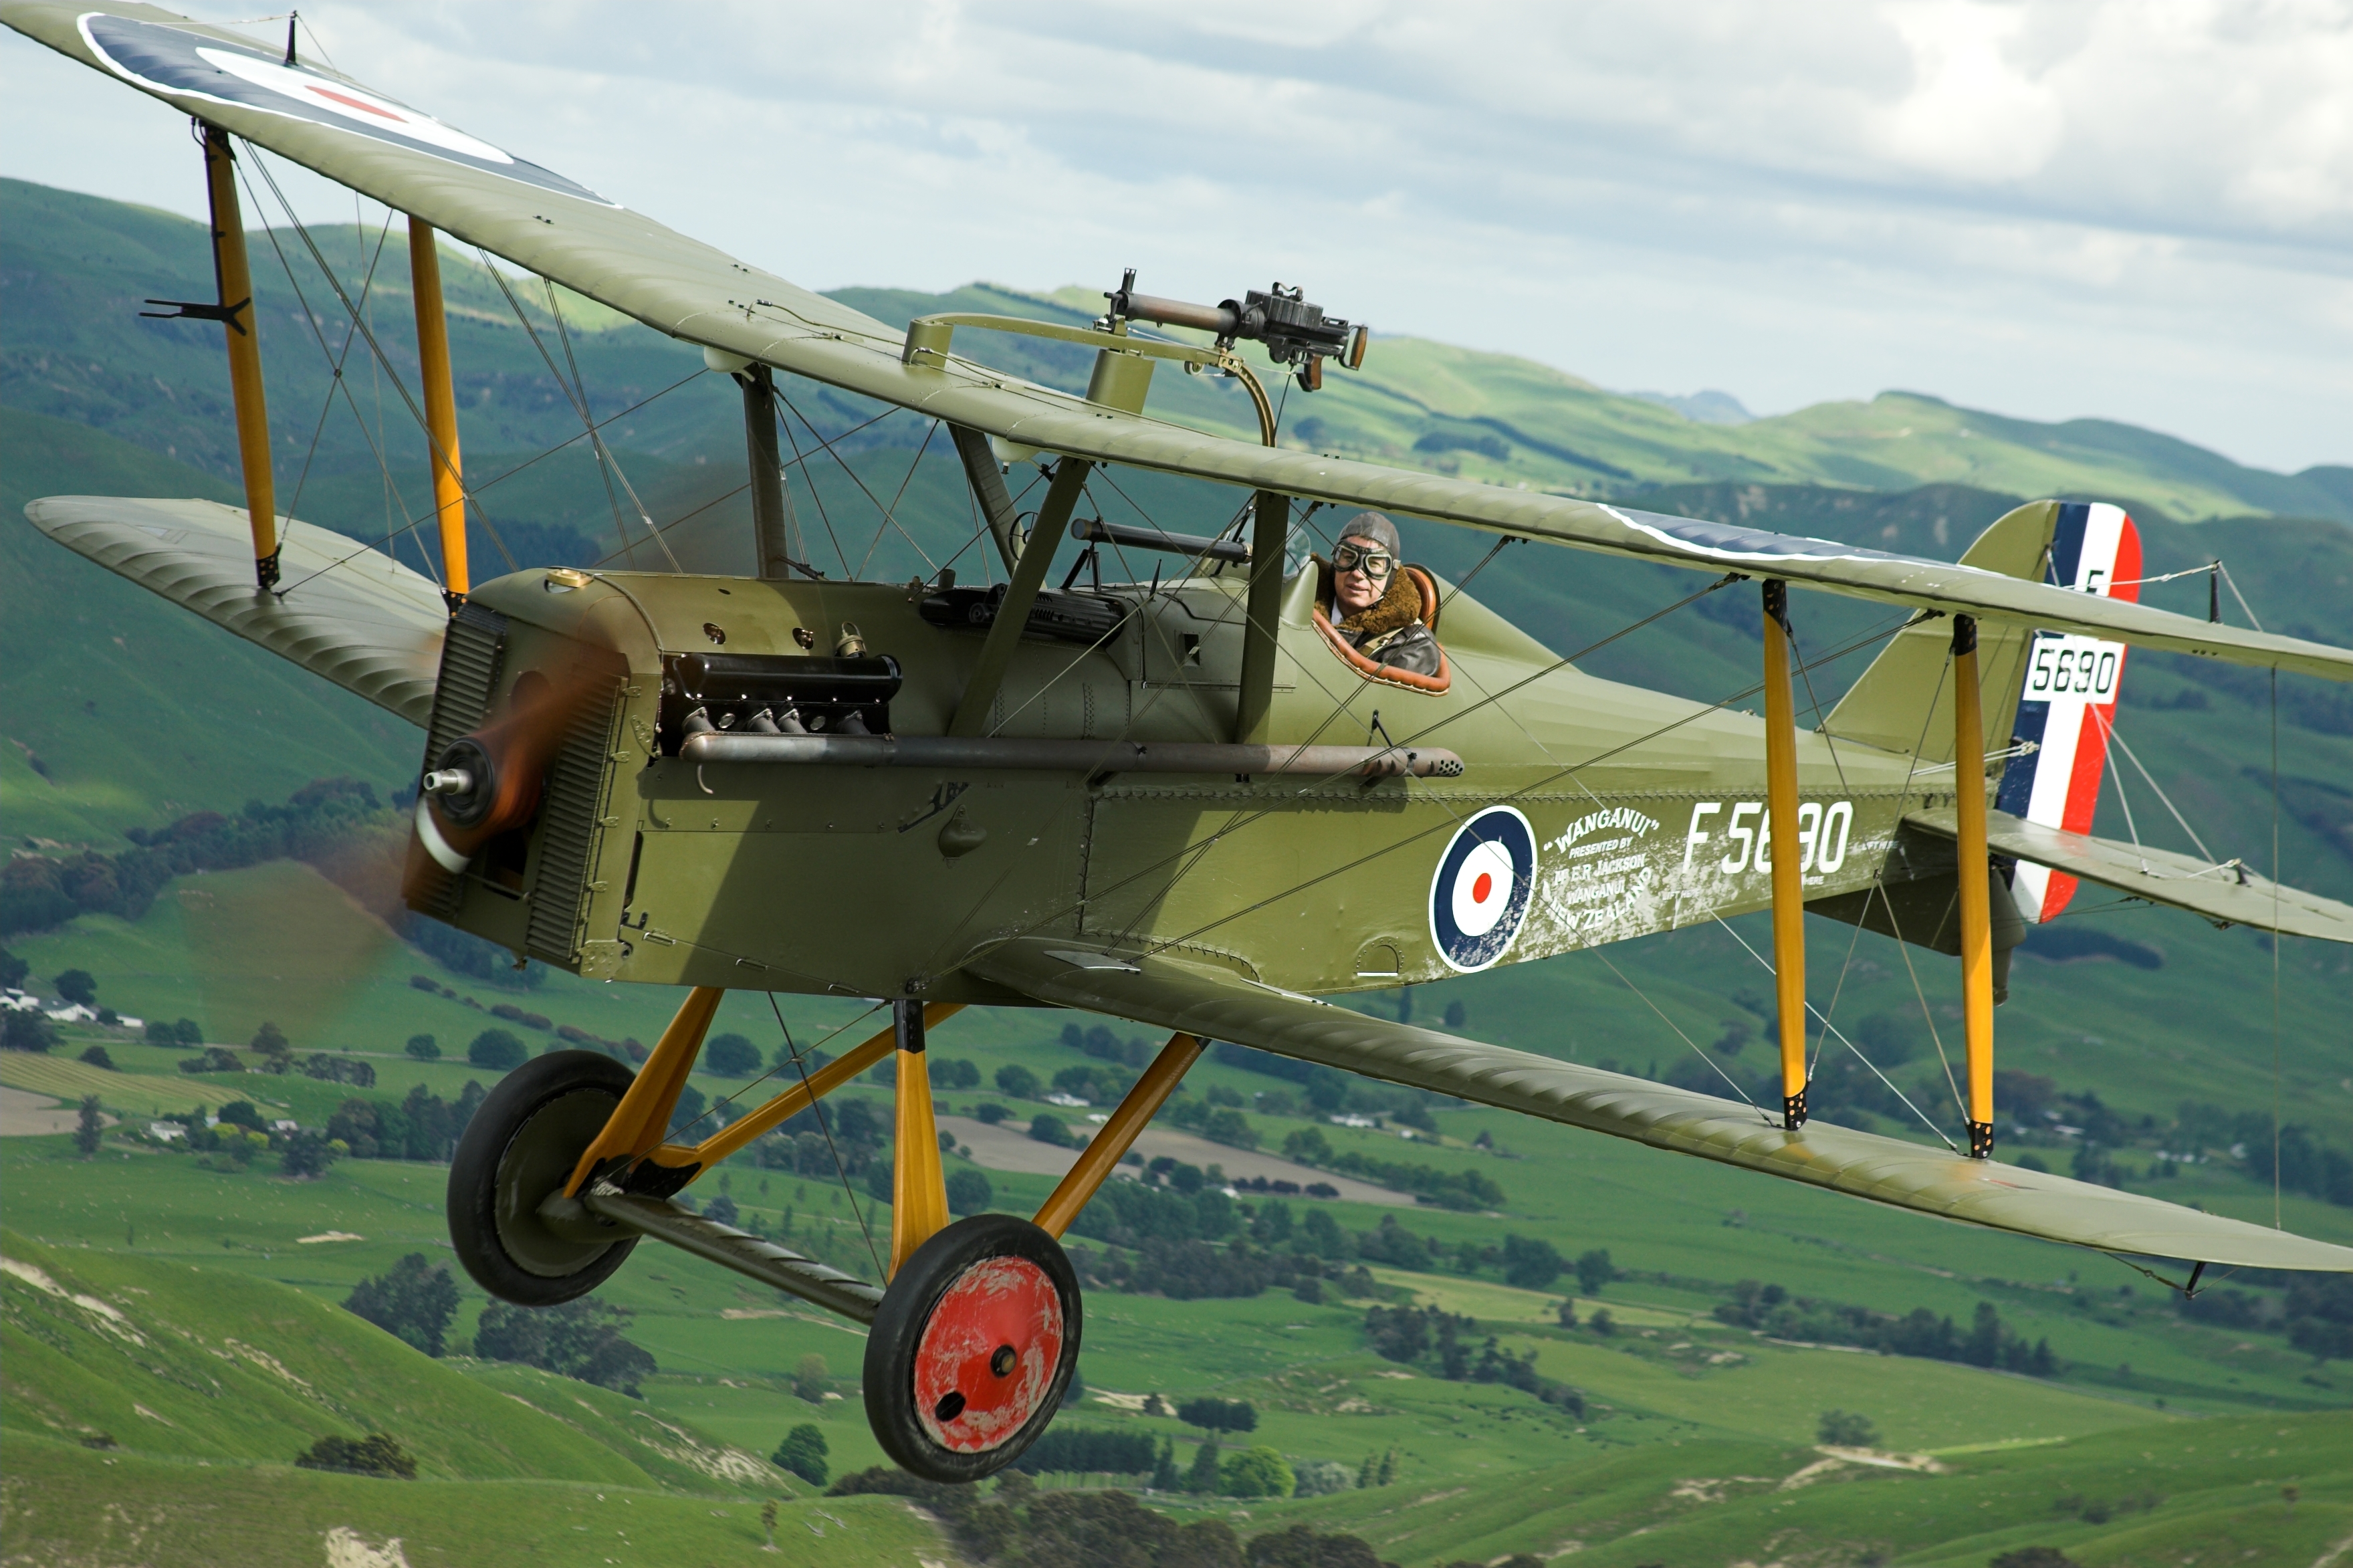 The adverse yaw is easily compensated for, by balancing aileron application with rudder and doesn’t prove to be a problem at all. Next, slow flight and stalls are explored, a good idea to check before landing.... again nothing unusual other than the fact that this airplane is rather easy to fly. Adjusting the elevator trim allows the SE5a to be flown hands off something I’m not used to in a WW1 fighter. A few more stalls are investigated and a power off stall speed of 43 mph is noted.
 With the power pushed up a bit, a conservative top speed of 115- 120 mph is achieved! I would expect during wartime even this top speed would be increased to the reported numbers of about 138 MPH. The only aircraft that could come close was the Fokker DVII, so the SE5a was faster than anything out there and very competitive with the later produced DVII. The performance doesn’t seem to diminish with altitude either, it can maintain 120 mph right up to about 15,000 ft. After the formalities of recording figures for temperatures, pressures and airspeeds, it’s time to really get a feel for the new plane. I am still amazed that it is so easy to fly and feels so stable. Turns in either direction are simple as long as they are coordinated with the rudder. Climb performance is a respectable 750 feet per minute or so. The controls feel good at low speed and there is plenty of warning before the stall. The Se5a isn’t overly agile but it can be thrown around with a little effort and has the ability to dive away and pick up speed rather quickly. The engine speed is easily regulated and only occasional glimpses of the temperature gauge are needed to regulate the radiator shutters and keep the engine cool.
“Compared to other Great War fighters it is rugged, reliable and very stable, and an excellent gun platform allowing an accurate shot from a greater distance. If I were comparing it to a more modern aircraft I would have to relate it to a 1950s era Great Lakes trainer, the SE5a certainly doesn’t feel like a ninety year-old design.”

 Preparation for landing is relatively easy; check the air pressure is still between 1 and 2 PSI, we wouldn’t want the engine to starve of fuel on approach. Enter the traffic pattern downwind at about 70 mph reducing throttle and airspeed as you go; turn base to final and reduce to 55-60 mph, over the fence at 50 hold it off as long as you can and touch down three point just as the stall is approached at 45. Directional stability at this point is rather good and the airplane rolls out straight ahead, any corrections are easily made with rudder and you will find the steerable skid is very effective.
I have noticed one small problem that a pilot can encounter on landing; it is very easy to get your foot caught between the rudder bar and the spar carry-through-tube when trying to apply full rudder. To avoid this you simply have to remember that most pilots of the time flew with cavalry boots on, so place the heel of your shoe as far forward on the rudder bar as you can and use the strap that goes over your foot as security this way your foot is far enough forward it wont get caught against the carry through tube. Another way to avoid this is to lift your heels and steer more with your toes on the rudder bar. Once you get out without burning yourself on the exhaust stacks or hitting your head on the gun... you can admire this machine as the great flying machine it is.
Image gallery of the SE5a walkaround
